
Adding Custom Fields
If you wish to capture particular information in your issues, you can add custom fields. Custom fields you create can be linked to one or more projects so as well as creating the field, you will also need to link it to any relevant projects.
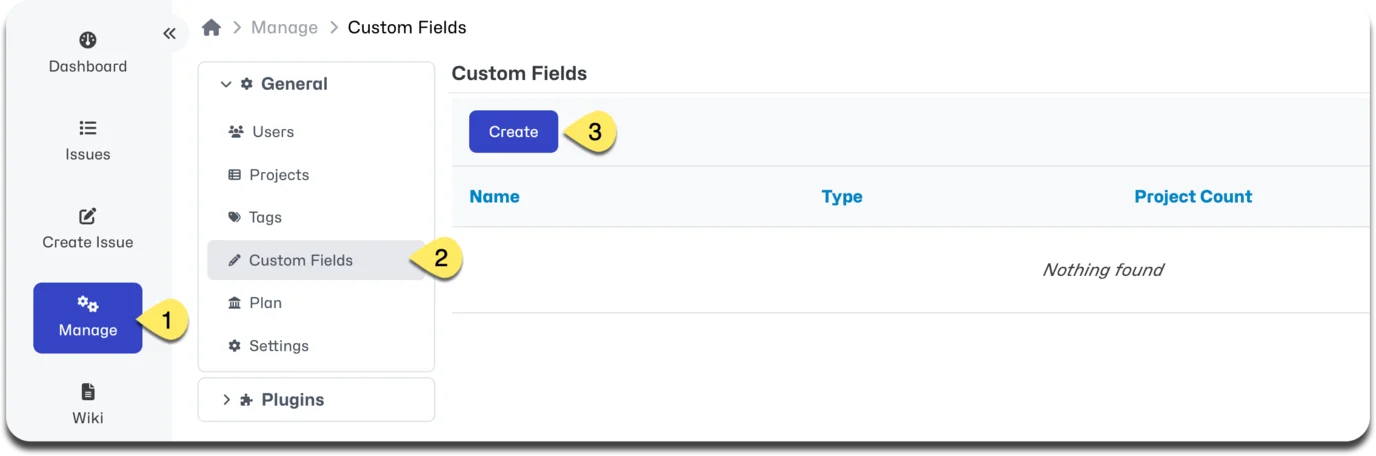
To create a custom field go to Manage - Custom Fields and click "Create". Then proceed to define the parameters of your custom field.
Type and Possible Values
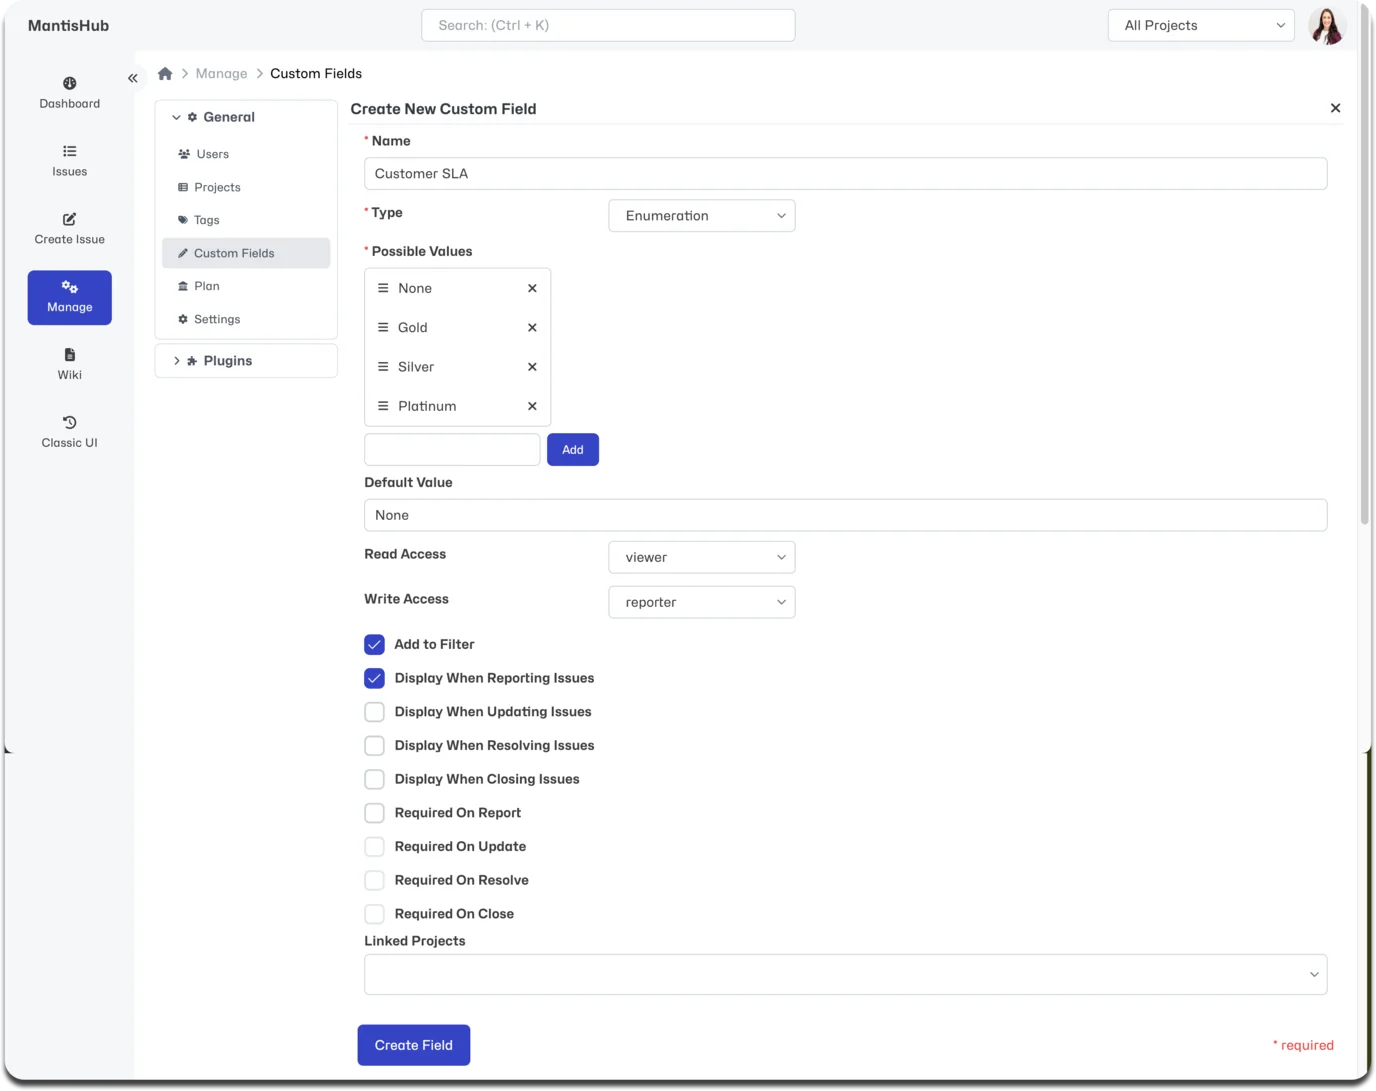
You need to select a type for the field from the drop down list (e.g. date, string, list etc).
For custom field types that allow selection from a set of values, you need to define 'Possible Values' by typing in the value name and clicking add. You can re-order the possible values by clicking and dragging the hamburger icon (3 horizontal lines) next to the value name.
Custom field types that allow possible value lists include: enumeration, checkbox, list, multi-selection list, and radio.
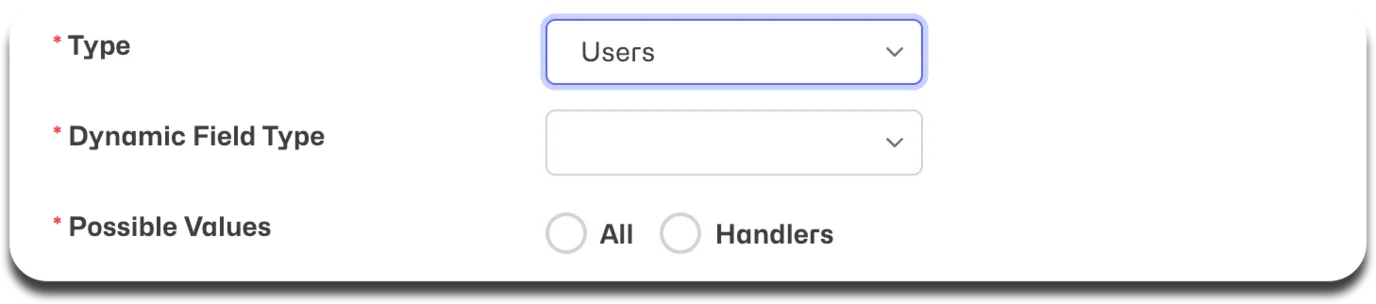
You can also reference your MantisHub users, versions and categories fields as values of a custom field. You'll see these 3 options in the Type dropdown menu.
Userswill take values from the list of MantisHub users. Possible values:All- will list users with access to the project + empty/none optionHandlerswill list users that can be assigned issues in the project + empty/none option
Versionswill take values from all non-obsolete versions. Possible values are:All- will list all non-obsolete versions defined for the project + empty/none optionReleased Versionswill list all released versionsFuture Versionswill list all non-released, non-obsolete versions
Categorieswill use your list of categories. Great for defining a sub-category.
Default Value
The 'Default Value' definition allows the custom field to have a suitable default value based on the field type. In most cases, it is a simple value like a string, a number, or a value from the list of possible values. However, for the Date type, the possible values can include values like: {today}, {tomorrow}, {+3 days}, {-7 days}, {next week}, {15 December 2013}, etc. Basically any format understood by PHP's strtotime() method can be placed inside curly brackets and used here.
Display and/or Require Custom Fields
Make sure to check the boxes specifying the actions on which the custom field should be visible, and whether or not they are mandatory.
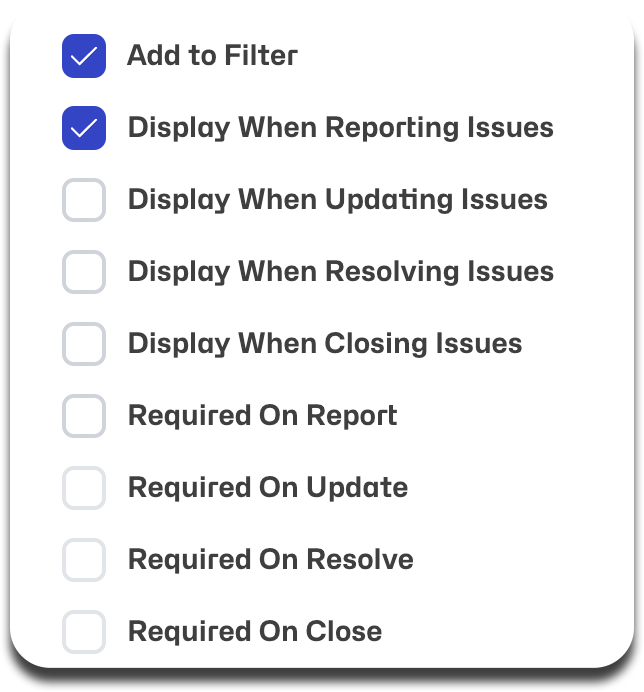
If you 'Require' a field for a particular action, then the system will automatically set it to be displayed also. You cannot have a field required but not displayed so you will not be able to uncheck the 'Displayed' option in such a case.
Linking to a Project
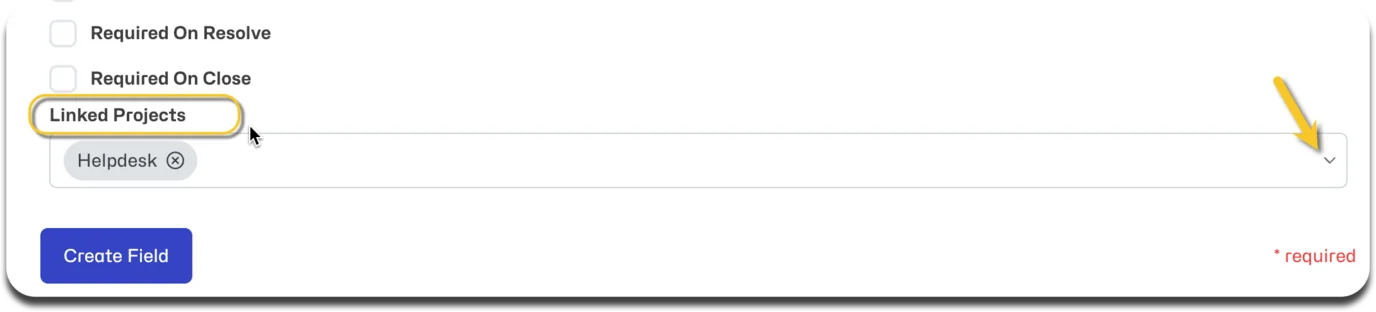
Within the custom field creation form, right at the bottom, you'll see the 'Linked Project' section. You can click the dropdown and check the boxes for all projects for which you want to use the custom field.
You can re-order how the custom fields appear within Issue View, Issue Update and Create Issue pages. This needs to be done within the project configuration in the "Custom Fields" tab. See Project Configuration for more details.