
Dashboards
The Dashboard feature allow users to create project dashboard pages to display customized issue lists, summaries and reports. Dashboards can be customized for each project to match the project and team requirements.
A dashboard is composed of one or more sections and each sections containing one or more widgets. The default "home" dashboard for a project has the following widgets:
- Pie graph view of Issues by Assigned user (developer)
- Pie graph view of isues by Status
- "Assigned to Me" Issue list
- "Reported by Me" issue list
- "Followed by me" issue list
In addition to project dashboards, when 'All Projects' is selected, the User centric dashbaord is showed. The user centric dashboard includes the typical Assigned to Me, Unassigned, Reported by Me, etc.
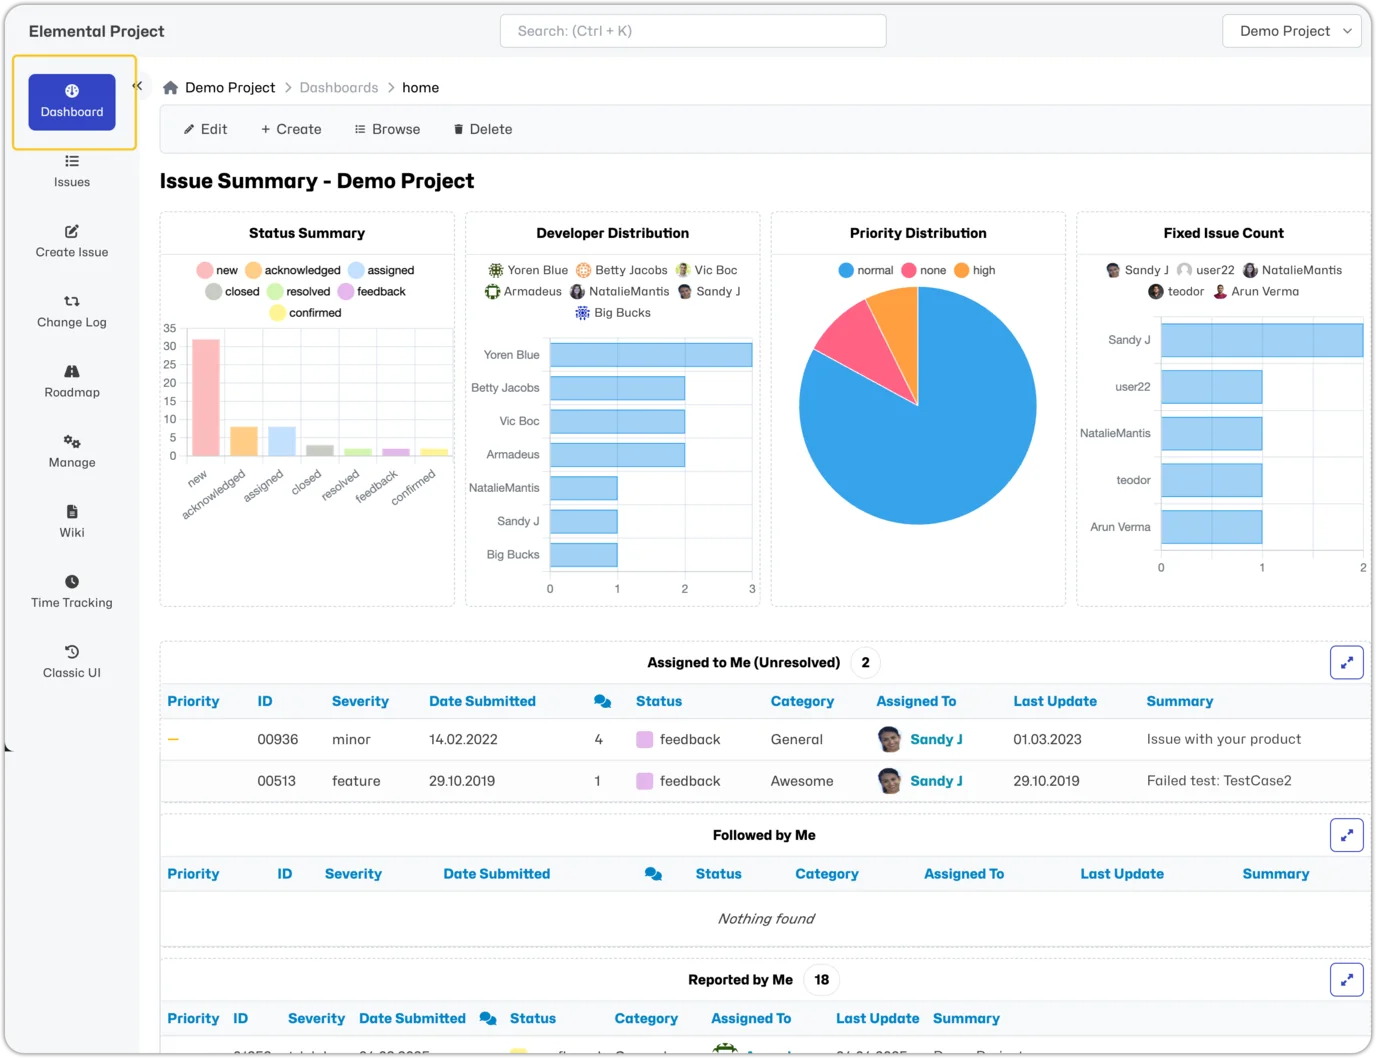
Dashboard access and navigation
The default or home Dashboard page for each project will be displayed each time you open the project dashboard page. The home dashboard is only configurable by users with Manager or Administrator access level. However all users can create a project dashboard. Once created, all other (non-home) dashboards can be seen by clicking the 'Browse' button.
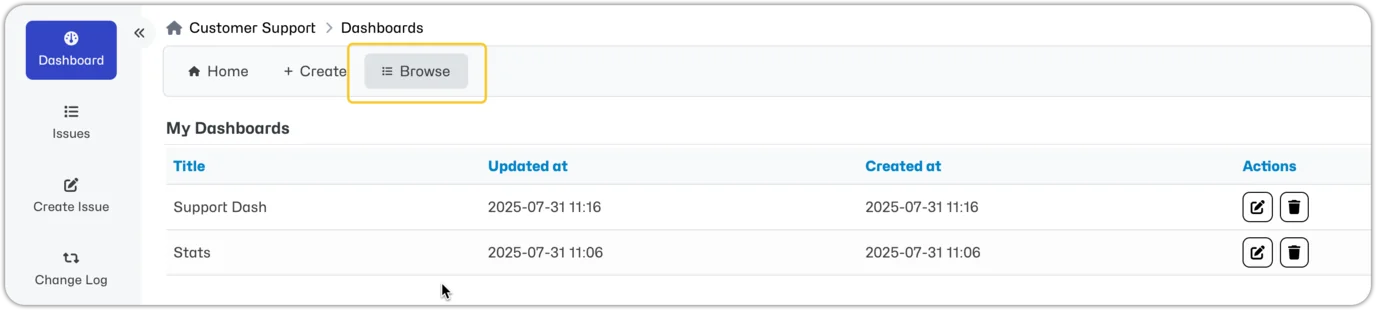
Search functionality for project dashboards is available to help you find the one you need. Selecting a dashboard from the list will display the dashboard temporarily, until you navigate away from the Dashboard page. Once you return to the Dashboard, it will revert to the home Dashboard.
Creating a Dashboard
To create a Dashboard, follow the below steps:
From the Dashboard menu, within the desired project, simply click Create in menu at the top of the page.
Give your dashboard a Name (this should have no spaces or special characters) and a Title.
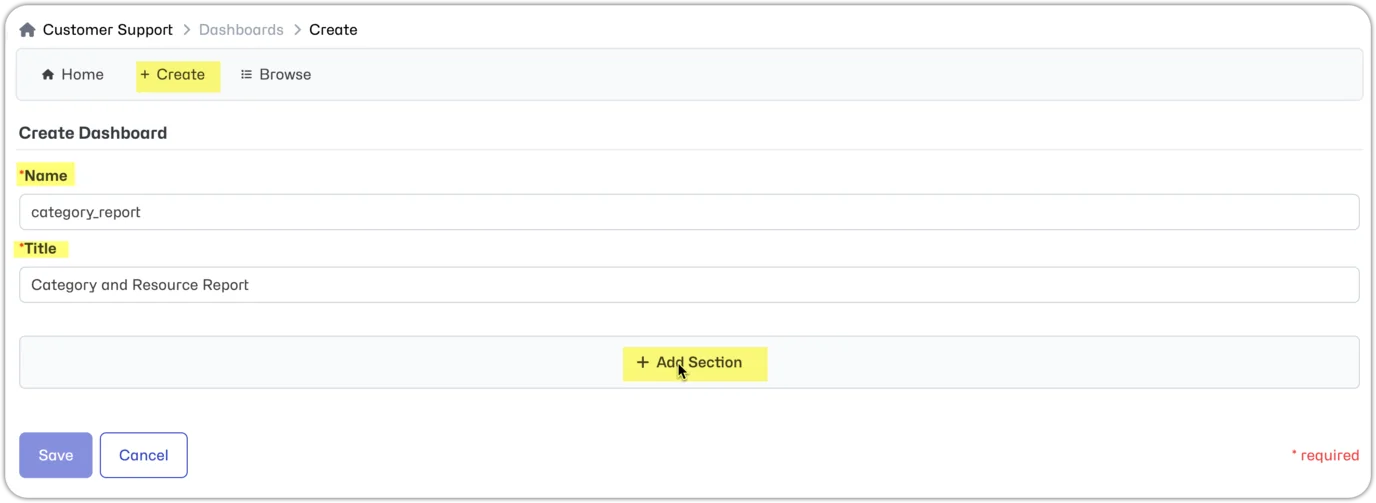
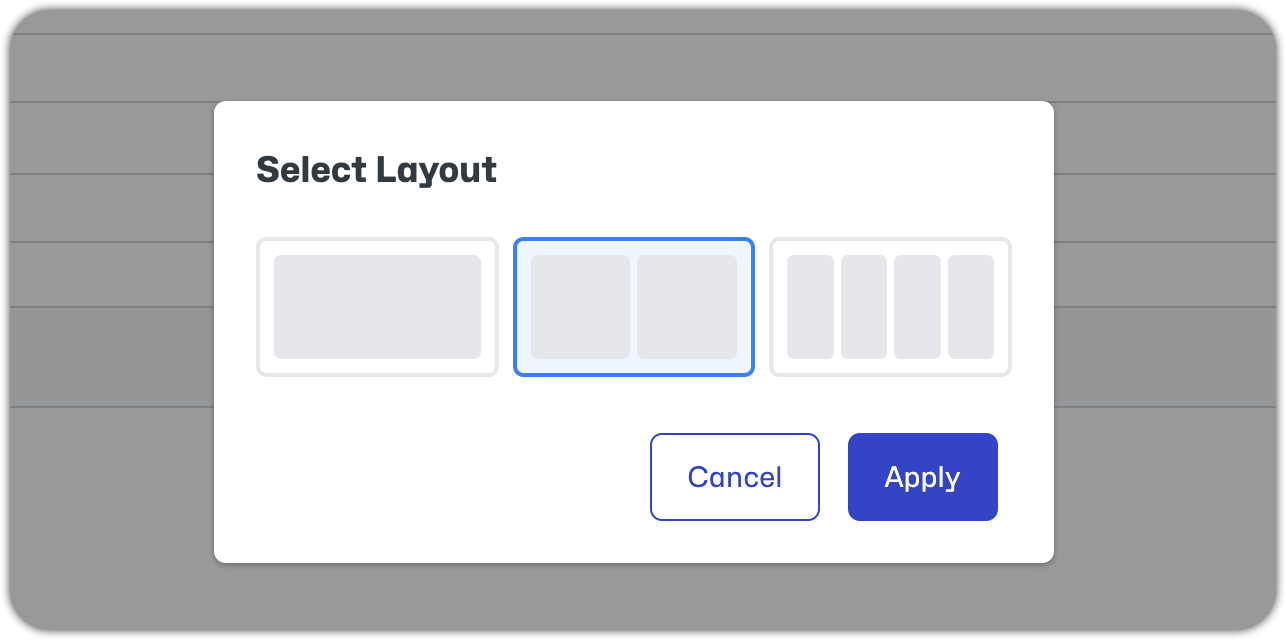
- Next you need to Add Sections: Each section can be a single column, two column or four column display. Each section can wrap to have multiple rows of widgets. So you only need to add new sections when you are going to a new display format. For example, if you have chosen a two column display and added 3 rows of widgets (6 widgets total) but the next widget you want to add should show as a single column, then you will need to add a new section.
- Next Add Widgets: Select a Widget from the available list and click 'Next' to configure the widget. Widgets can be:
- Various graphical representations of issue information,
- Filtered list of issues*
- Issue count of issues matching specified criteria,
- Changelog or Roadmap for a specified project version
- Markdown Text.
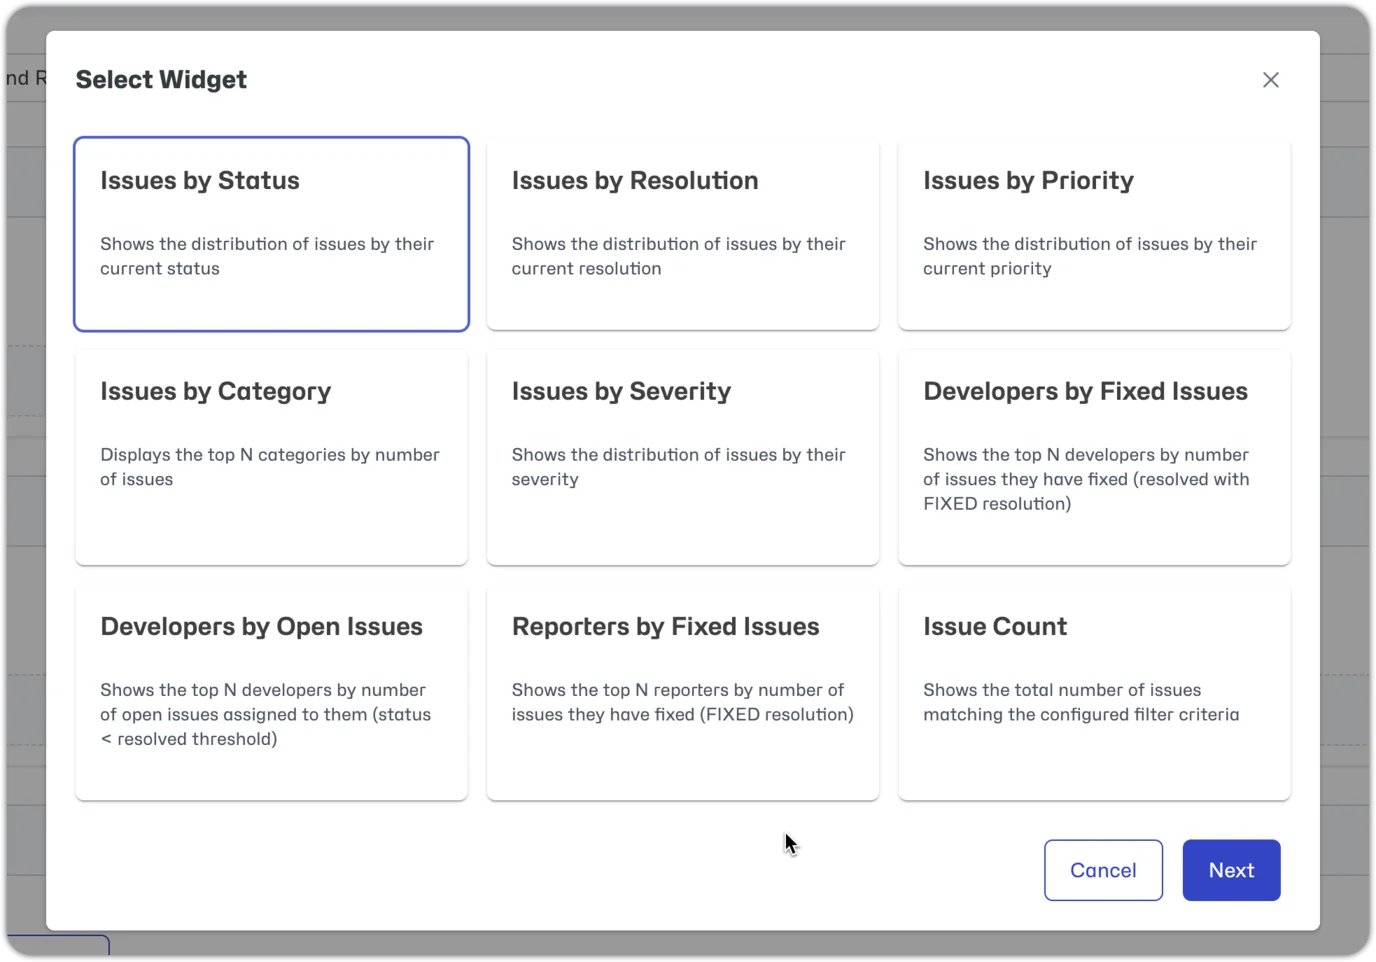
*NOTE: Issue lists are only compatible with a single column Section. Issue Counts are compatible with all section layouts. You can limit the Issue list to only show a set number of issues in the "Top 'N'" field.
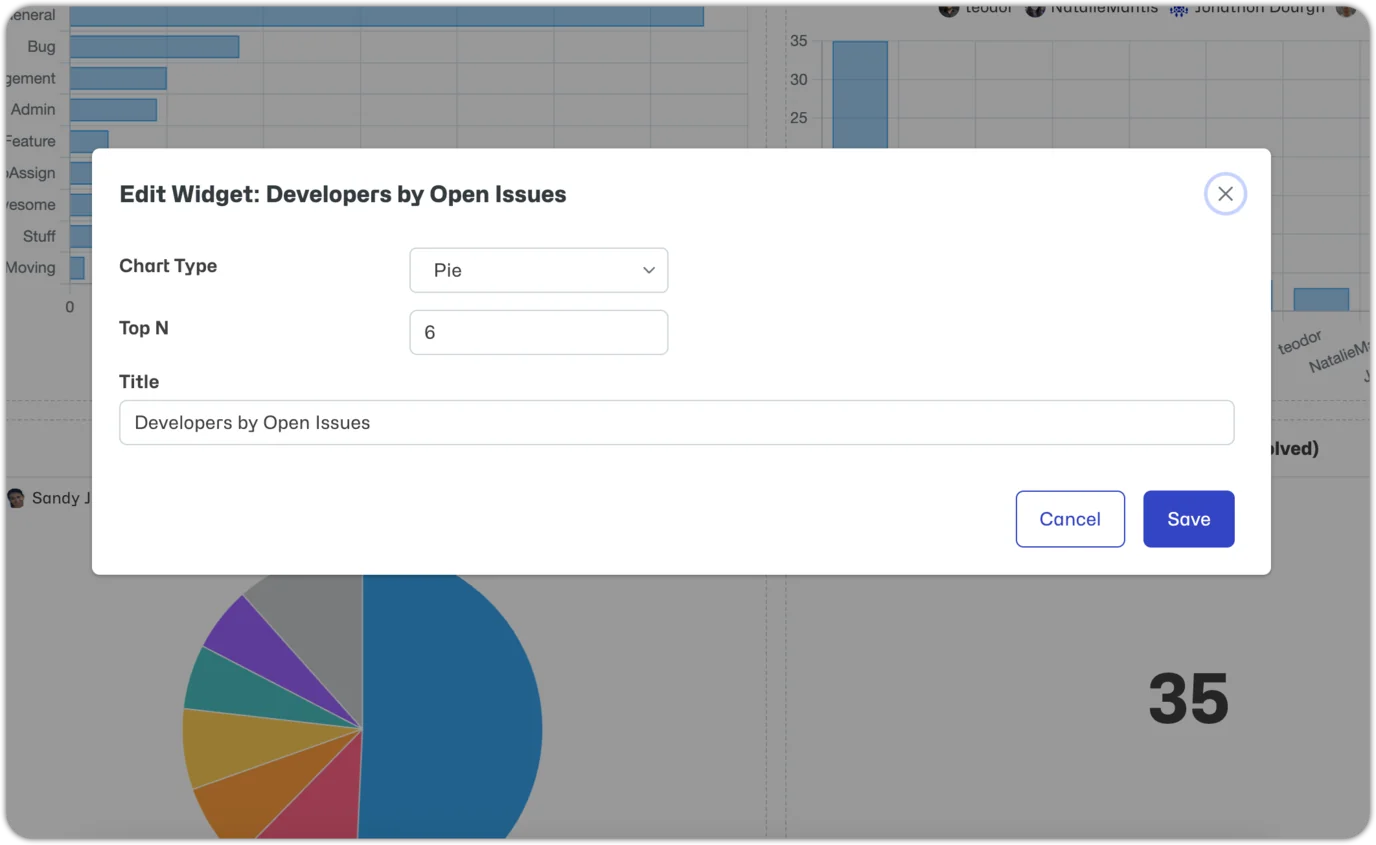
Once you have finished creating your dashboard, simply click 'Back' as changes are automatically saved.
Editing/Deleting Dashboards
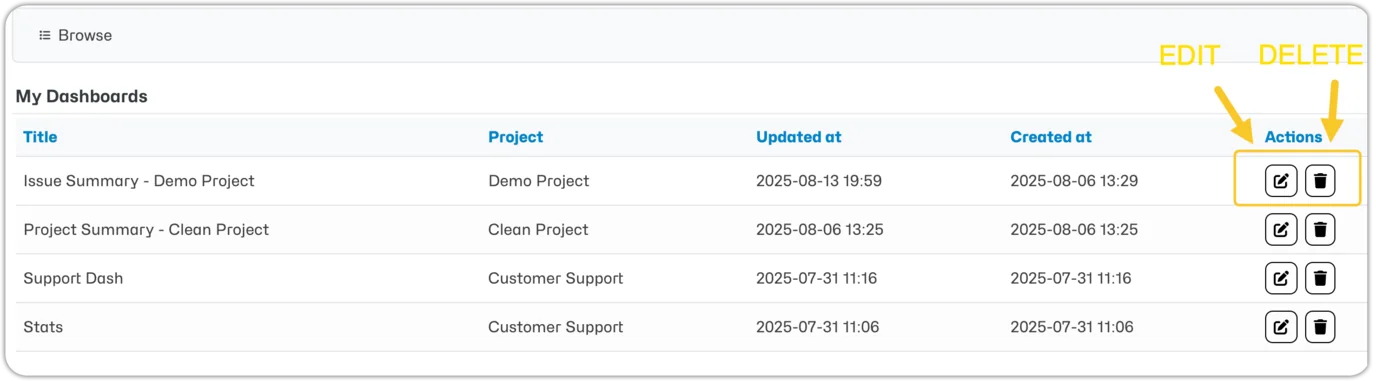
Head to the Dashboard menu and click Browse. To delete a dashboard, click the Delete icon next to the relevant Dashboard. To edit the Dashboard, click the Edit icon.
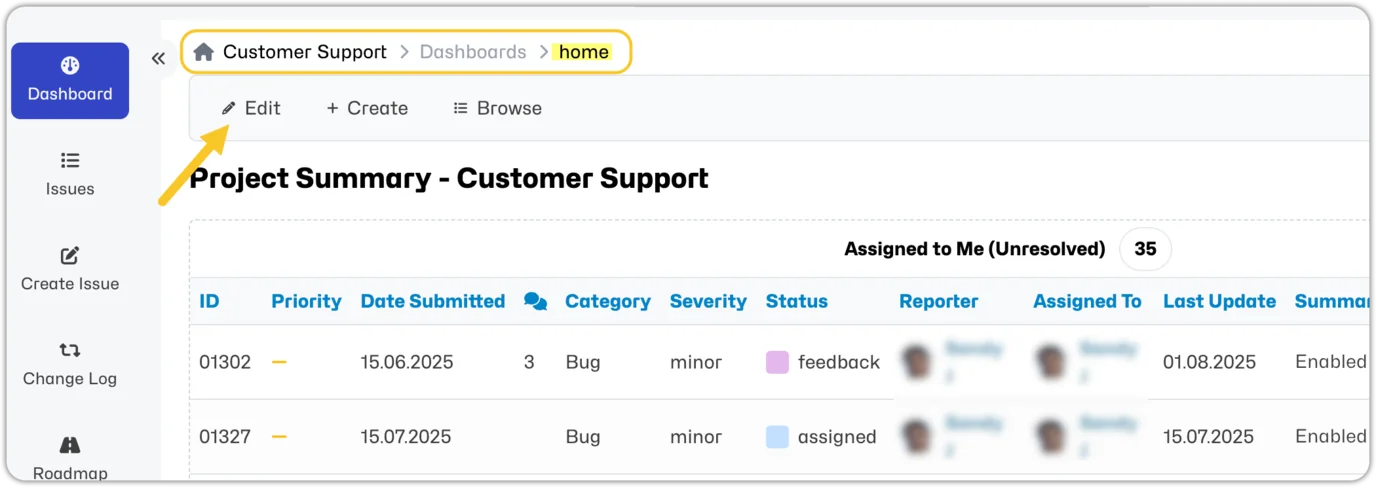
If you have a dashboard already applied to your Dashboard view, you will see Edit and Delete options in the top menu along with Create and Browse. "Home" dashboards cannot be deleted so you will not see the delete option when on the home dashboard.
You can change the name or title, add or delete sections, re-order a Section by dragging/dropping the sections 'Move' icon or re-configure a Sections layout by clicking on the 'Settings' icon.
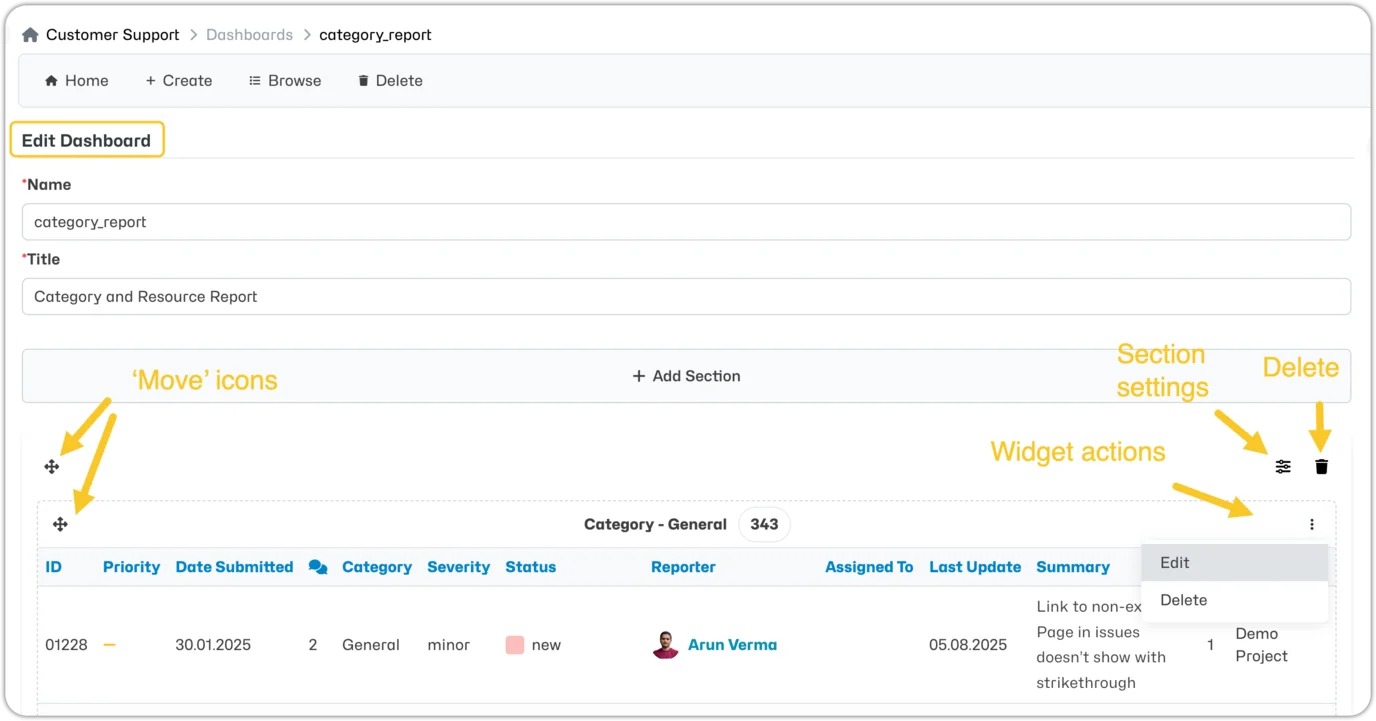
Within the section you will see all configured widgets. Click on the Ellipse in the top right to edit or delete the widget. You can re-order these by dragging/dropping the 'Move' icon. It is also possible to drag widgets to another Section.
Once you have made all your necessary changes, simply click 'Back' as changes are automatically saved.