
Filters
For those still using the Classic UI, please refer to the Classic UI article
Using Filters
Video Tutorial - Filters Overview
The 'Issues' page shows you a list of all issues in your project. The project will be whatever you have selected in the project selector or all issues across projects if you have "All projects" set in the selector. By default all issues with status 'closed' are hidden.
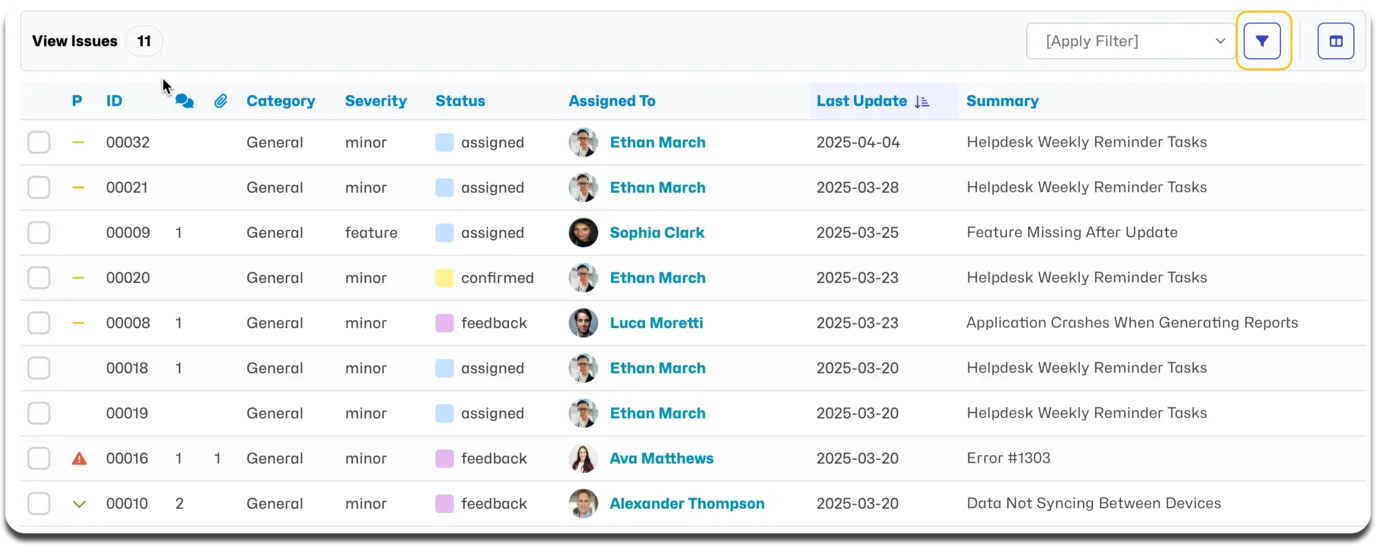
To filter the list of issues, click on the filter icon to the right of the issue table header, where you can enter your filter criteria, using the available fields. See Note below
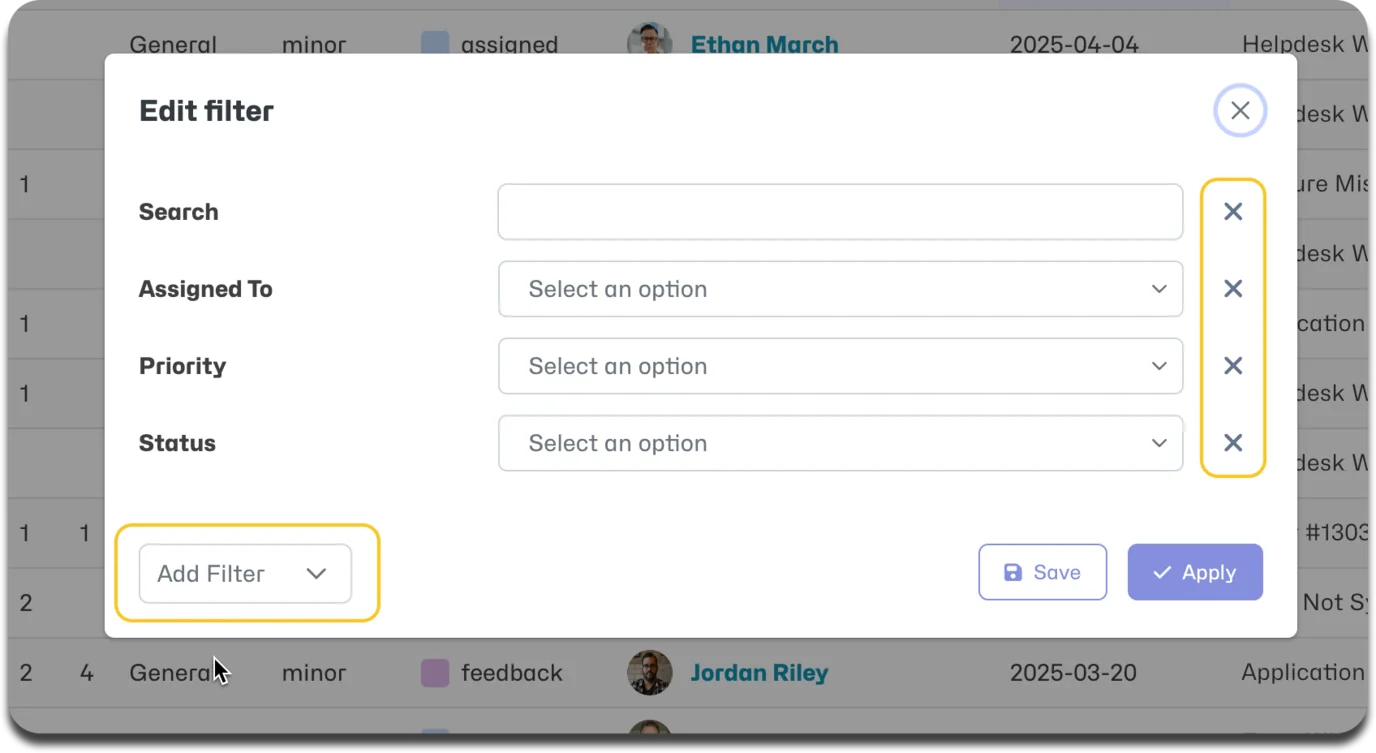
The initial filter shows some of the most common filter criteria (free text search, assignment, priority, status), and you can simply select one or more values from the drop-down boxes displayed. If you don't want to use any of these fields, you can simply ignore them or use the 'x' button on the right to remove them. If you need different fields, you will see the 'Add Filter' dropdown on the bottom left of the filter box.
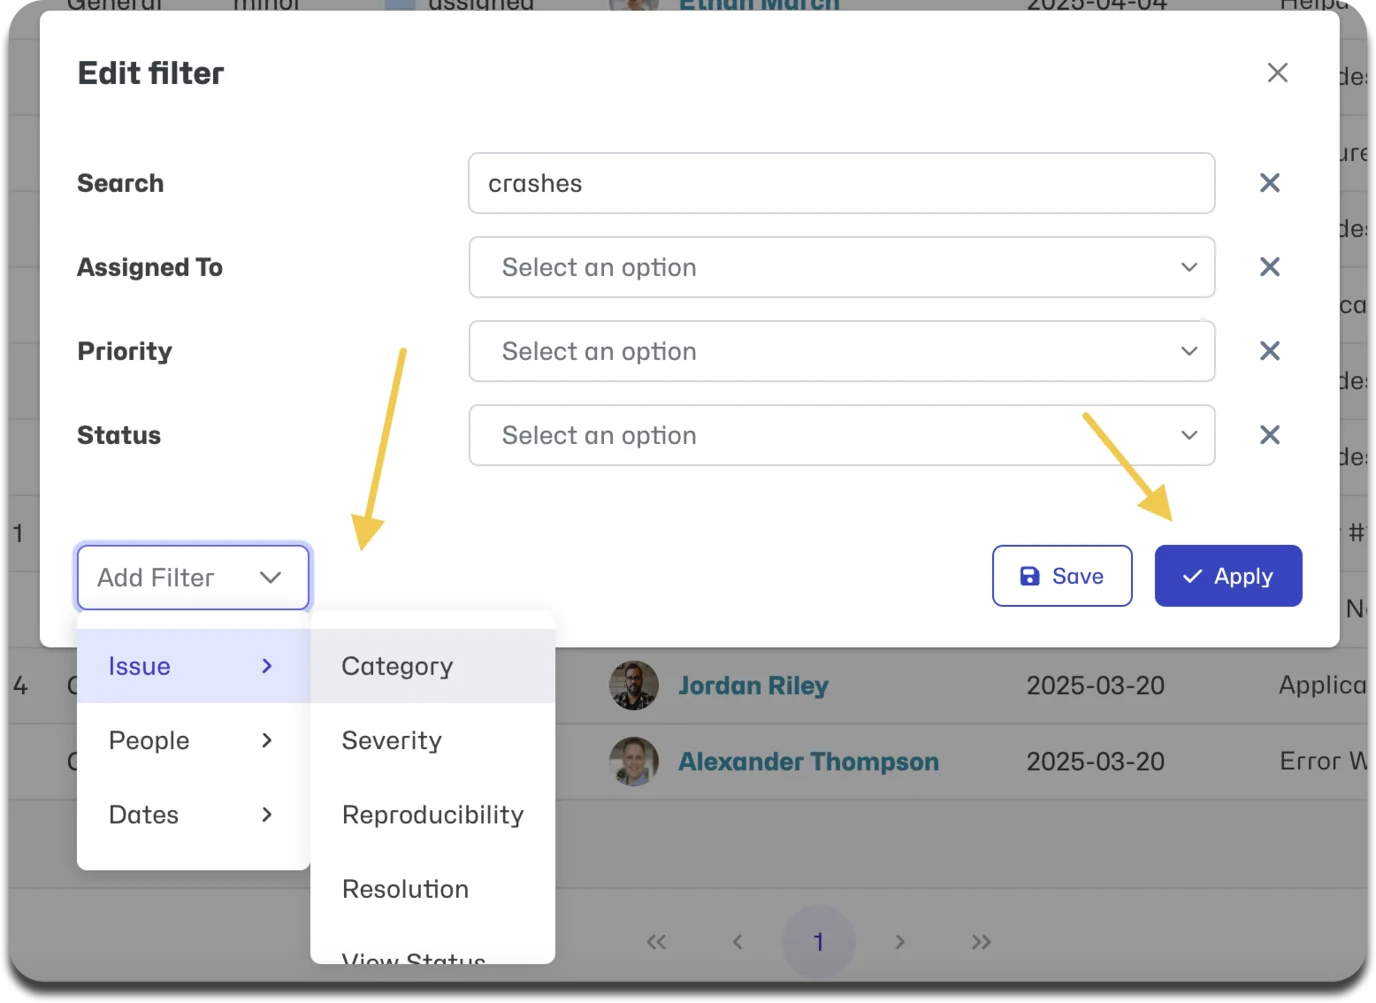
The fields available for filtering are divided into areas such as Issues (values of issue fields), People (e.g. reporter or handler of the issue) or dates (e.g. date created, updated) etc. Drill down into the relevant area and select your criteria to add. When you have filled in the field(s) you want, simply click the 'Apply' button.
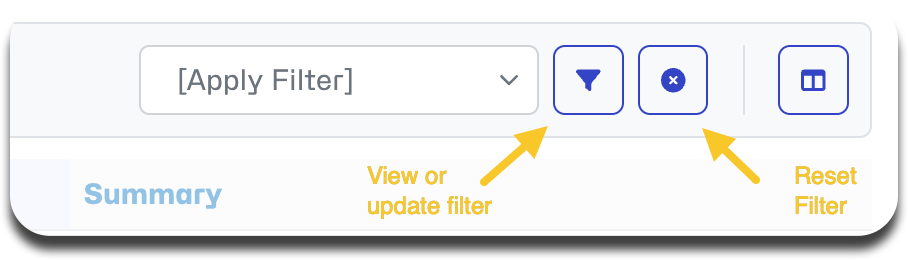
Once the filter is applied, only those issues matching your filter will be displayed. To go back to view or update the set filter, click on the filter icon again. You will also now see a reset icon next to the filter icon which you can click to reset to the default view.
NOTE: Project specific fields or field values such as linked custom fields, versions, categories etc will only be available for selection when their associated project is active in the project selector
Saving and Sharing Filters
By default, MantisHub stores the latest adhoc filter per project, so that users retain their latest filters between login sessions, or as they switch between projects.
However, it is often useful to save filters so that the user is able to easily switch between them. You can also share these filters so other team members can make use of the same filter.
Creating a saved filter
To save a filter, in the 'View Issues' page:
- Make sure the correct project is set in the project selector, on top right corner. See 'Note' above
- Set the filter criteria and click 'Save'
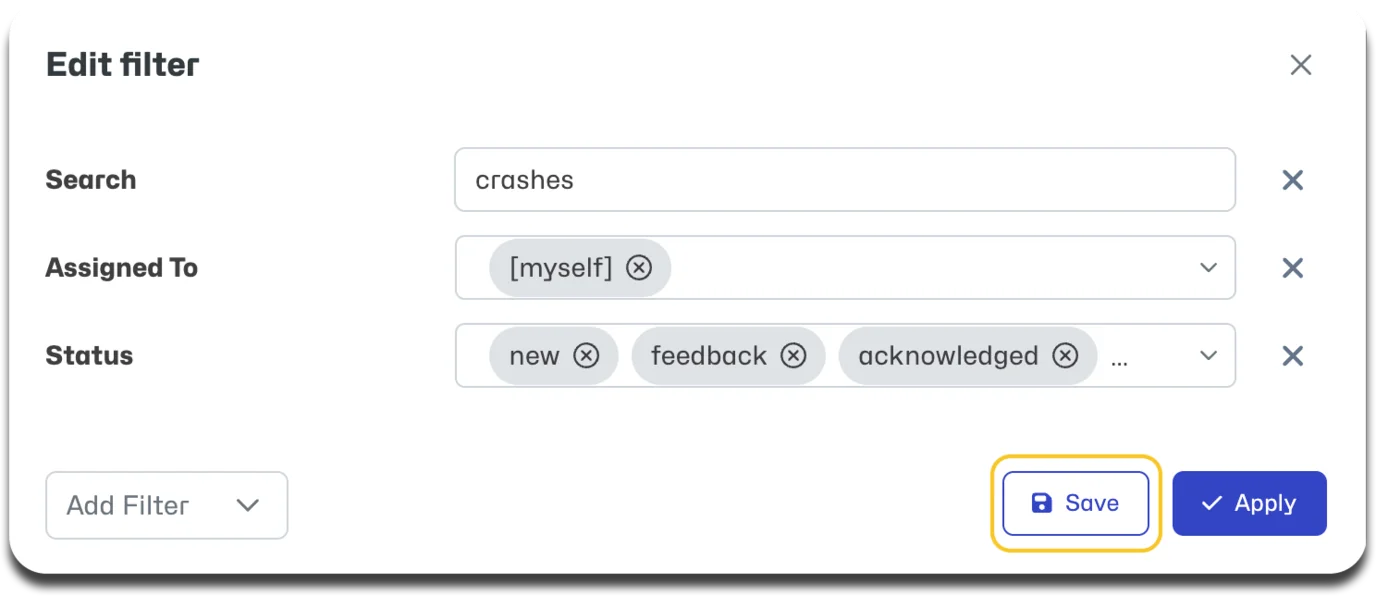
Then...
- Provide a name for the filter.
- If you want to make the filter available to all users, check 'Shared'. If unchecked, the filter will be private for your own use only.
- If you wish to make the filter available across projects, check 'All projects' If unchecked it will only be available in the project set in the project filter. (See NOTE above regarding project specific fields)
- Click 'Save'
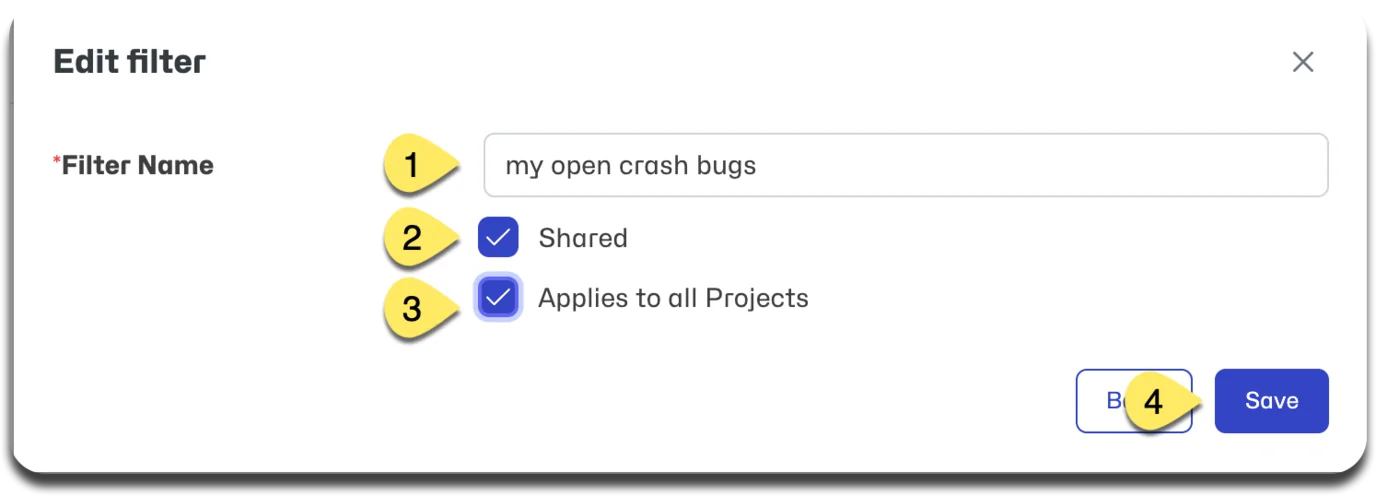
Applying and Managing saved filters
To apply or switch between saved filters, simply select it from the dropdown box to the left of the filter icon. The dropdown will first display MantisHub pre-packaged/default filters and you'll see your saved filters below these.
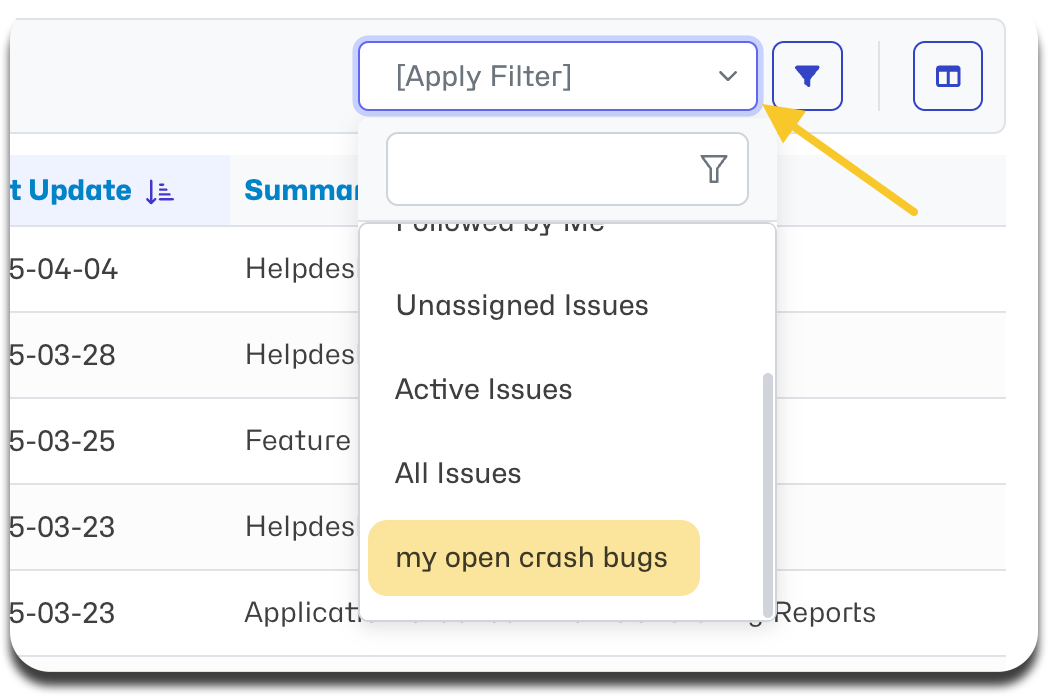
You can manage (edit or delete) your saved filters. First apply the filter via the dropdown. You can make changes and hit 'Save' or you'll see a 'Delete' button if you wish to delete it.
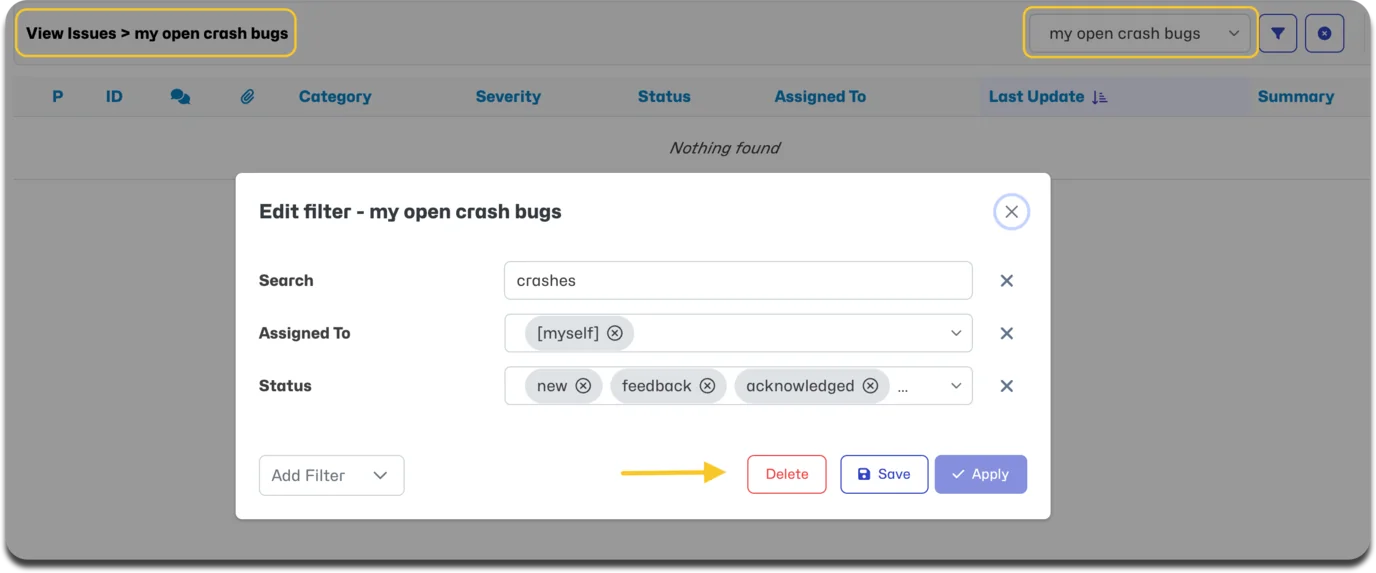
Filter Configurations
Permission to use, save, and share a filter can be modified.
To configure any of these 3 settings, head to 'Manage' - 'Settings' and Click "Filters".
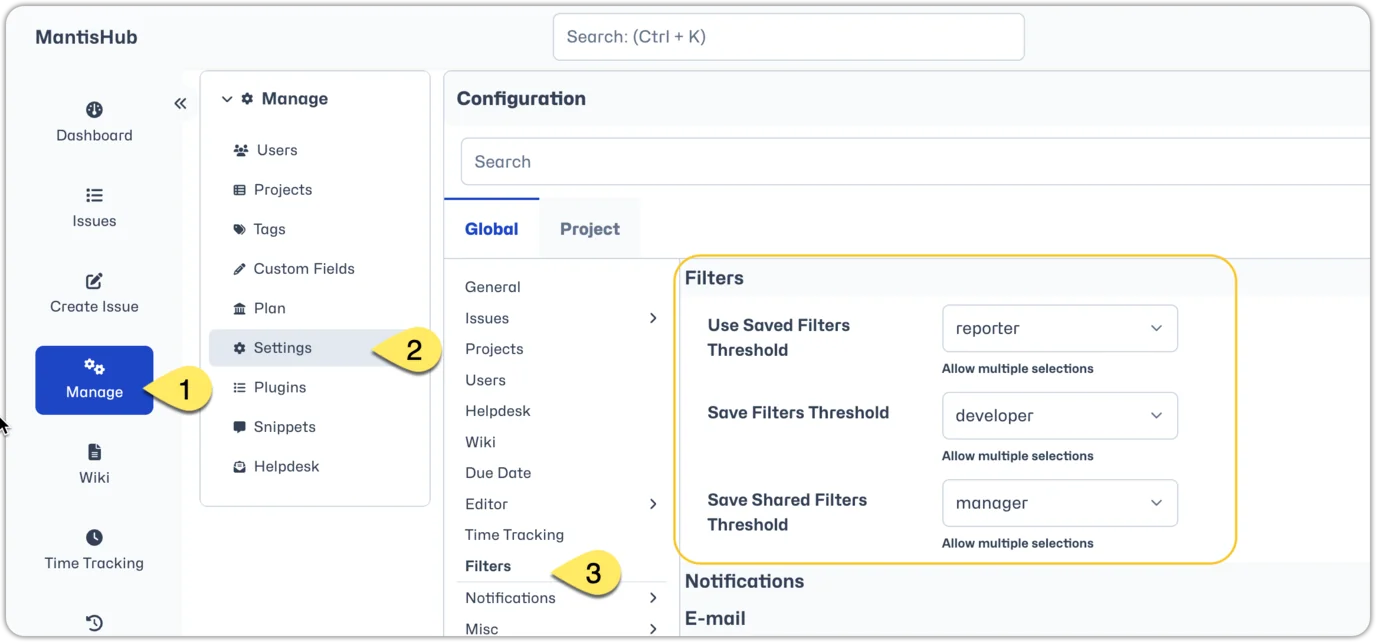
Set the minimum access level allowed to:
- Use Saved Filters: These users will have access to filters they or other users have saved. These will appear in their filter dropdown.
- Save Filters: These users can save private filters.
- Save Shared Filters: These users can save filters that can be shared with other users.
You can "Allow multiple selections" if you want to set a subset of users to have permission (e.g. reporters and developers but not updaters) rather than setting a minimum access level. Once you have clicked 'Allow multiple selections', levels will display checkboxes you can click to select.
Note: You should not set a higher access level permission for 'Use Saved Filters' than is set for 'Save filters'. A user will not be able to save a filter if they don't have permission to use saved filters
Filtering on Semantic Values
Filters often are based on static values like “v1” for a version. However, in other cases it is desirable to use semantic values. Such values include:
- [any] - don’t filter on this field.
- [none] - field must not be set (e.g. issue not assigned).
- [myself] - issue assigned to the logged in user.
Such values are particularly important when defining filters with the intention of sharing.
For example: say I wish to be able to retrieve issues assigned to me that are blocking. So I would create a “My Blocking Issues” filter, defined as:
- priority = blocking
- assigned-to = [myself].
By using [myself] rather than my own username, I can now save and share this filter so that any user can find their assigned, blocking issues.
Filters Through API
Once a filter is defined and saved via the web UI, the filter is made available via the API. Clients can leverage the API to get a list of filters and then use any of them to retrieve matching issues.
In addition, the API exposes a set of standard out-of-the-box filters like “Reported by Me”, “Assigned to Me”, “Unassigned”, “Monitored by Me” etc.