
Due Date Tracking
If you are still using the classic interface, please head to the Classic UI Article.
The Due Date feature allows users to add information and establish goals for their issue Service Level Agreements (SLAs). This functionality aids in prioritizing issues and tracking milestones effectively.
When activated, each issue will have a Due Date field that can be filled in either manually or set with a predefined default.
Additionally, the Due Date field will show color-coded warning levels if the issue remains open (i.e., not in a resolved or closed status) as it approaches or surpasses the specified due date. You can also export Due Date information for reporting purposes.
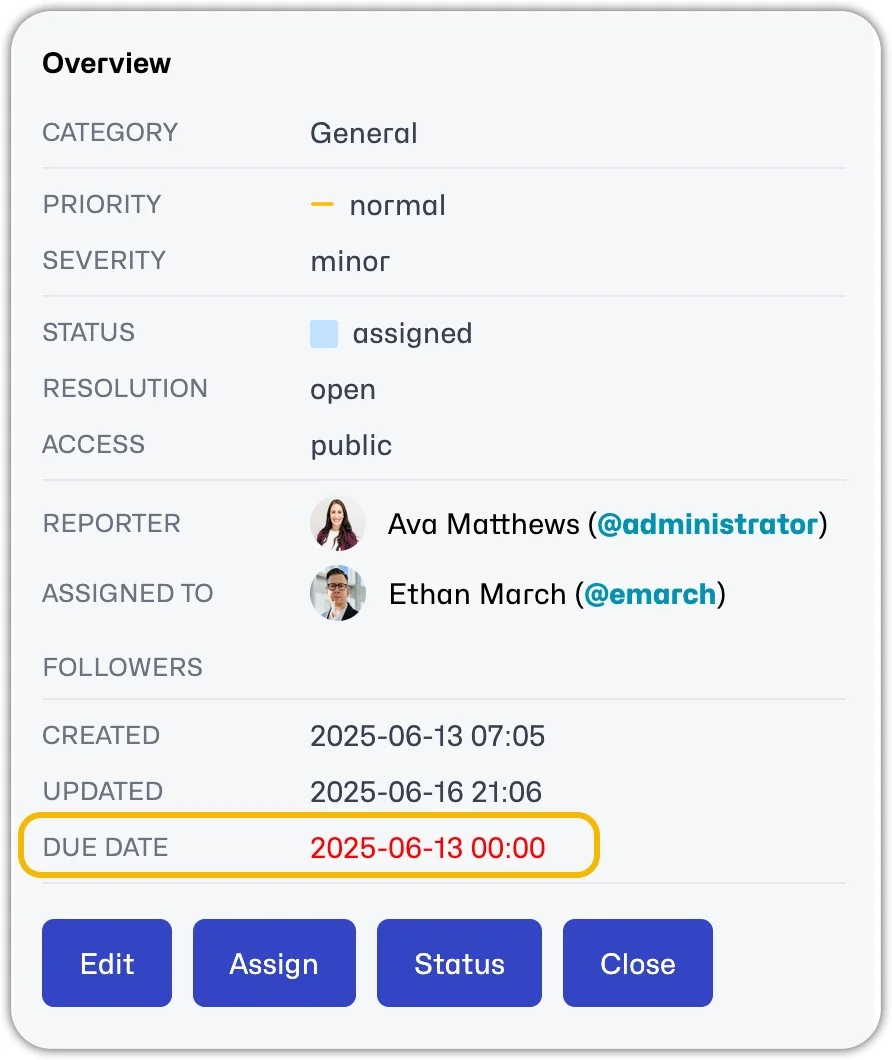
Turn on Due Date tracking
To enable the Due Date functionality, you must allow users to view and update the Due Date field. Once the "Due Date View Threshold" and "Due Date Update Threshold" configurations have been added, only users with view access can see the field in the issue or the date entered. Only a user with update access can edit the field.
To add the configuration, go to Manage -> General -> Settings -> and scroll to "Due Date". Select the user access from the drop-down list, select the minimum access level allowed from the drop-down list, and "Save".
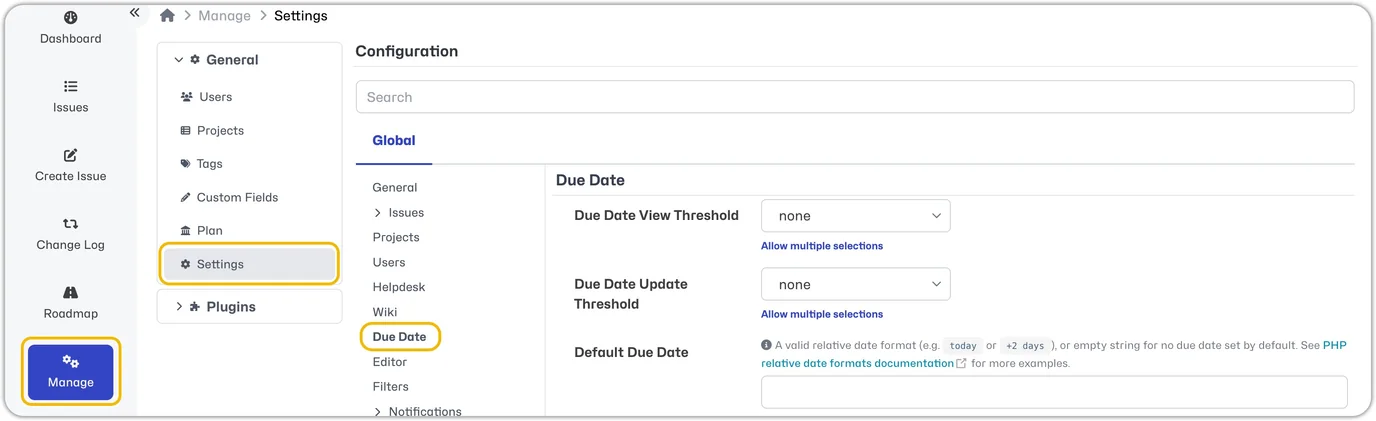
Configuring Due Date tracking
Default Due Date
You can also configure a default due date for new tickets. This value will automatically populate for all new tickets based on this setting. However, users with update access can change the default due date originally entered.
To add the configuration, go to Manage -> General -> Settings -> and scroll to "Due Date". Enter the "Default Due Date". You can set this as a fixed date or a date relative to the issue's creation date (i.e., +1 week). See format definition documentation for supported values.
Due Date Warning Levels
MantisHub allows you to set up three warning levels as your issue approaches its due date. The Due Date field text will change color according to these warning levels:
- Level 0 (RED)
- Level 1 (Orange)
- Level 2 (Green)
By default, the first two levels are predefined.
- Level 0 (RED) = 0 seconds, i.e., the second the Due Date passes, the field text will change to RED.
- Level 1 (Orange) = 604,800 seconds before, i.e., 7 days before the due date.
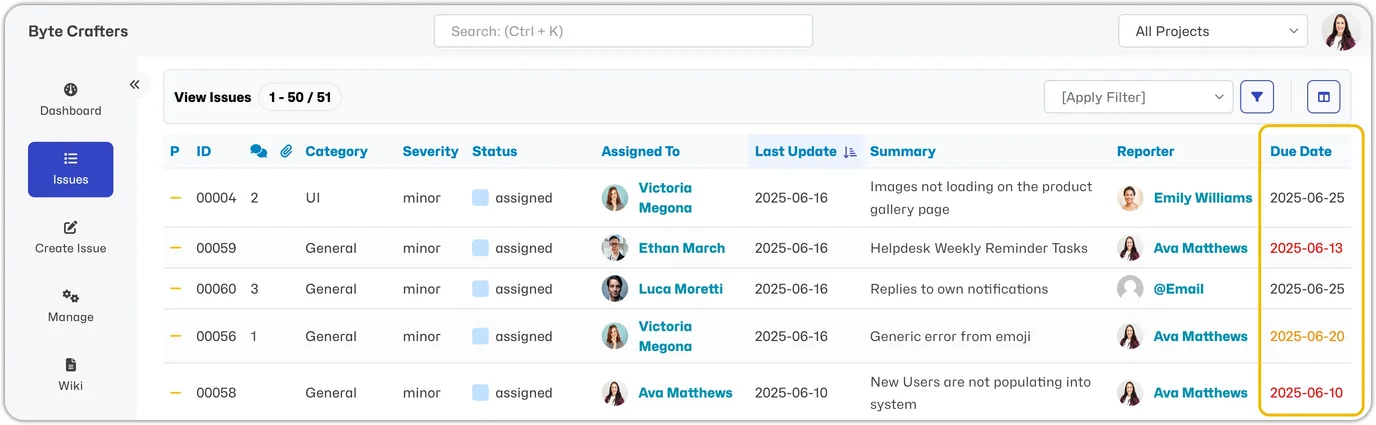
To modify due-date warning levels, switch to the Classic UI and add a "due_date_warning_levels" configuration option.
Warnings are defined as seconds before the due date. Use a negative value if you wish the warning to happen after the due date has passed. Some examples:
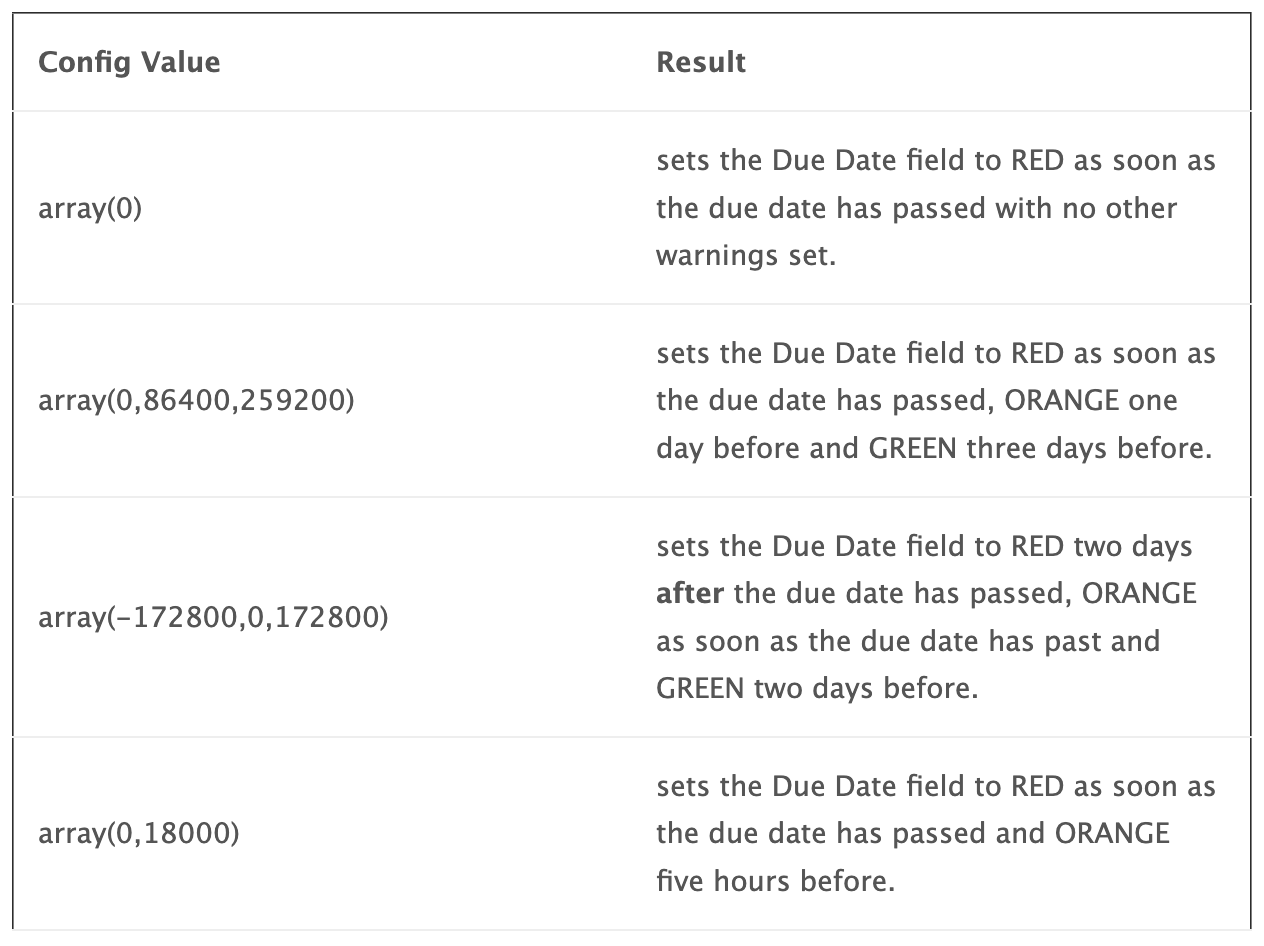
Note that all warnings will disappear when the issue is resolved or closed.
View or Export Due Date
To view the Due Date on your Issues screen update your "Manage Columns" view.
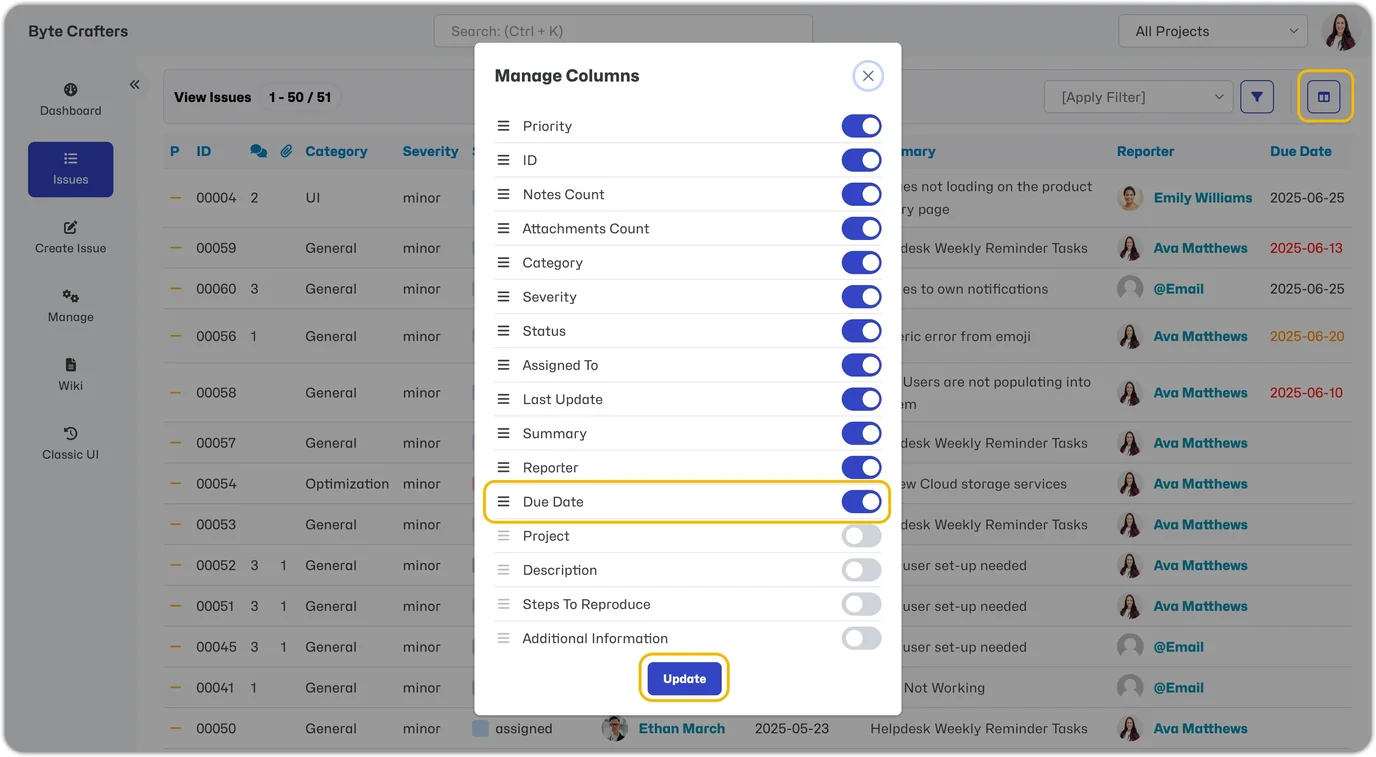
To add the Due Date column globally, switch to the Classic UI and update the "Manage Columns" view. Note that your personal column settings will override global settings, and only users with the relevant view or update permissions will see the date populated.
You can also switch to the Classic UI to add the Due Date field to an export of your data. Exporting this information and the "Last Update" field (typically the issue closure date) will enable you to run your analytical tools to assess how your team has met its set SLAs.