MantisHub Time Tracking
If you are still using the Classic UI, please see the Classic UI Article for further help.
Using Time Tracking
The time-tracking feature allows you to monitor the time spent on issues and access reports regarding that time. This feature is disabled by default, so you will need to update your settings to enable it.
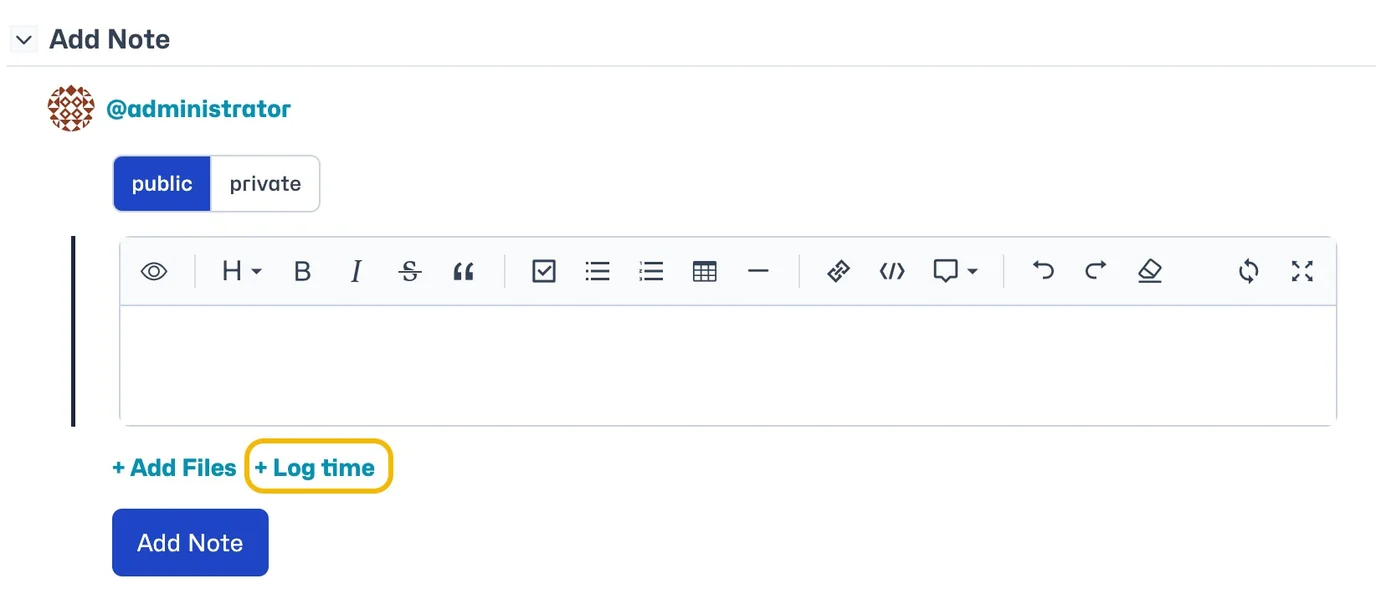
Once enabled, you’ll see a new "+ Log Time" field when you add notes to an issue, as well as a new "Time Tracking" menu option.
How to Log Time
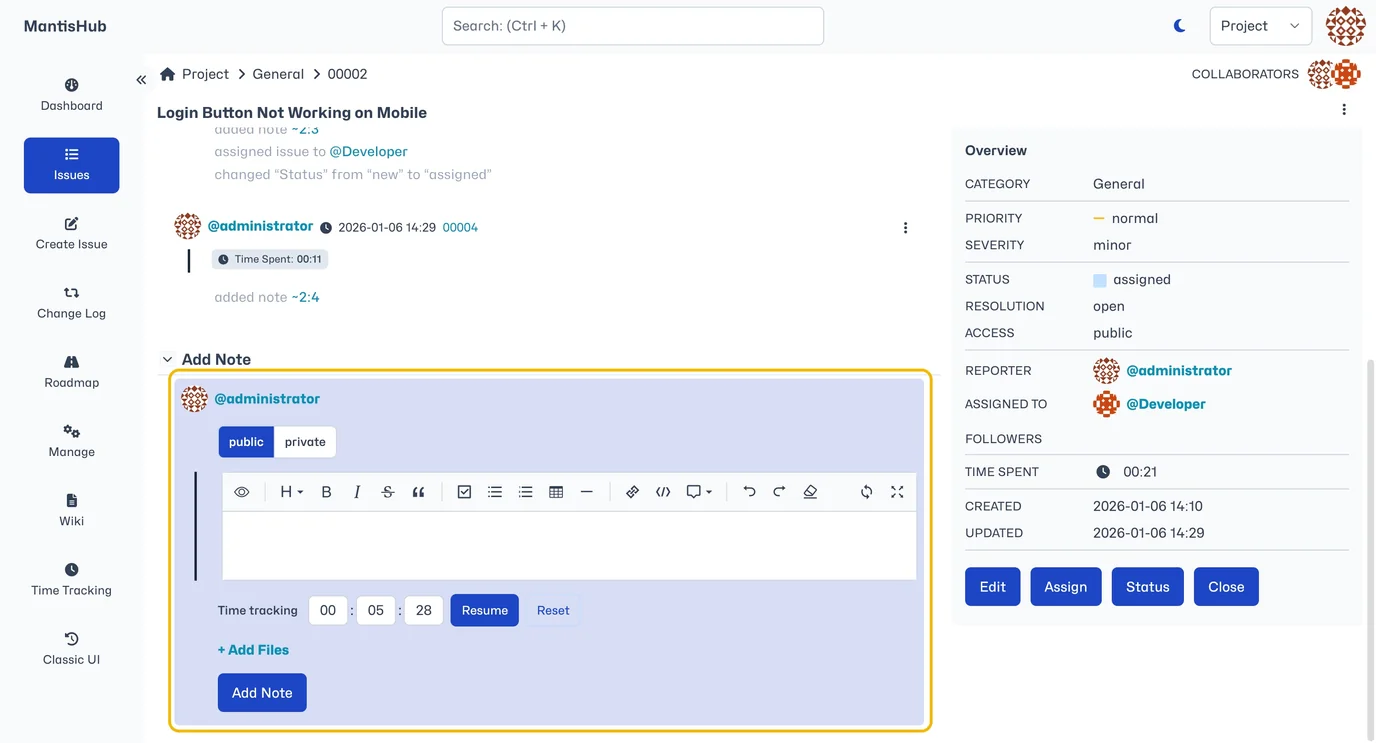
To log time spent on an issue, manually enter the time in the format hh:mm:ss provided, update the notes field if necessary, and select "Add Note" to record the time. You can include a regular note, a note with time associated, or time without a note.
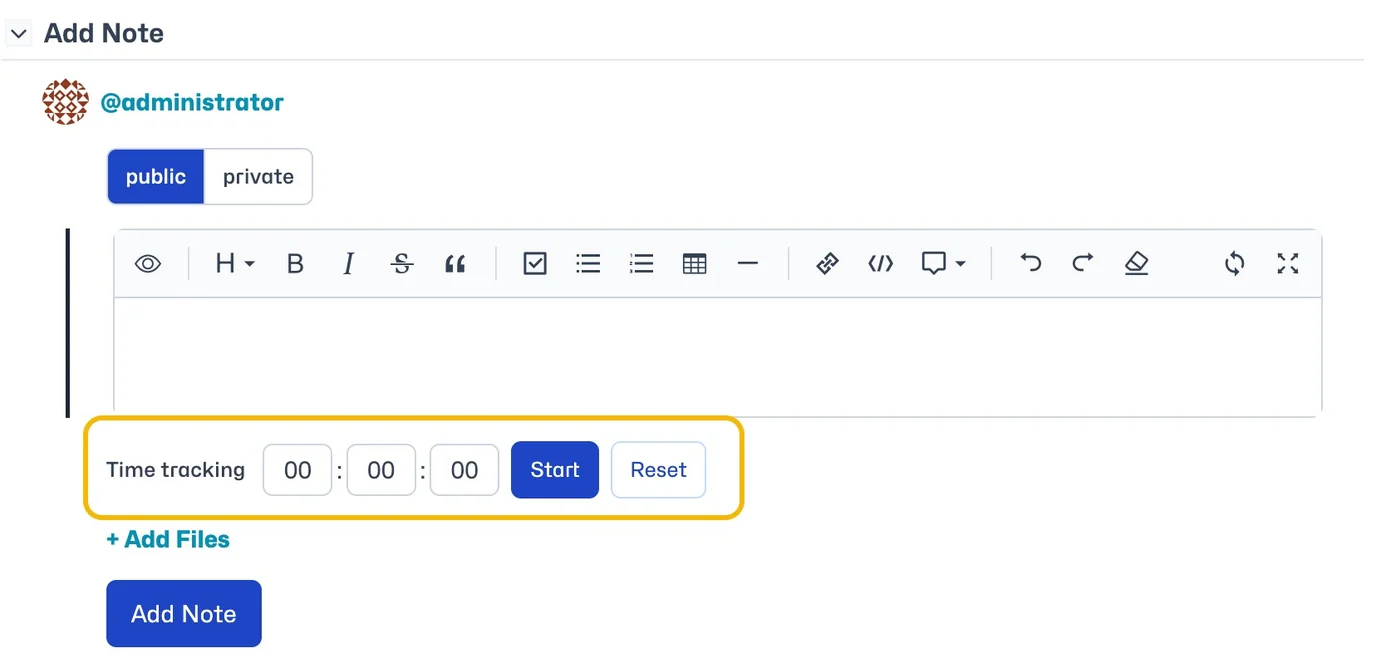
If you have enabled the stopwatch feature, you will see "Start" and "Reset" buttons. To use it, enter the issue, press the "Start" button (which will then turn into the "Stop" button). When you finish working on the issue, press the "Stop" button, update the note if needed, and select "Add Note." The issue will then be updated with the time spent. The "Reset" button will reset the counter to zero.
Additioanlly, once you start the stopwatch, a banner will appear at the top of your MantisHub screen. This banner will remain visible regardless of whether you stay on the issue screen or navigate to another page. It will display the timer, the issue title, and a "Stop Tracking" button, allowing you to switch pages without losing sight of what you are tracking.
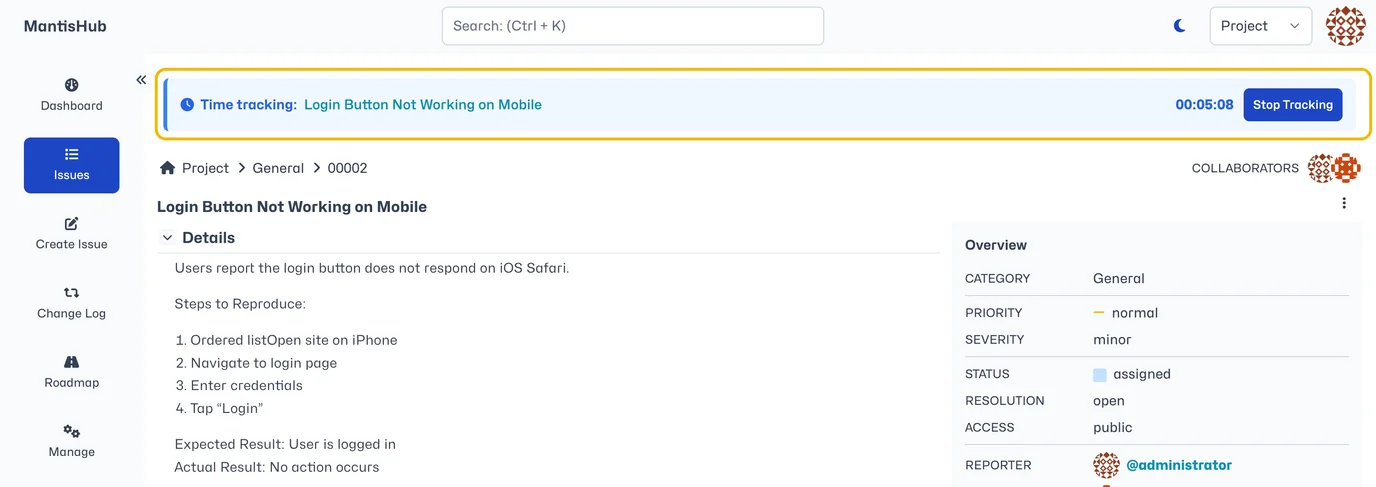
When you select "Stop Tracking," you will be taken directly to the issue screen, where you can "Add Note" to save this information.
How to View Time Tracked
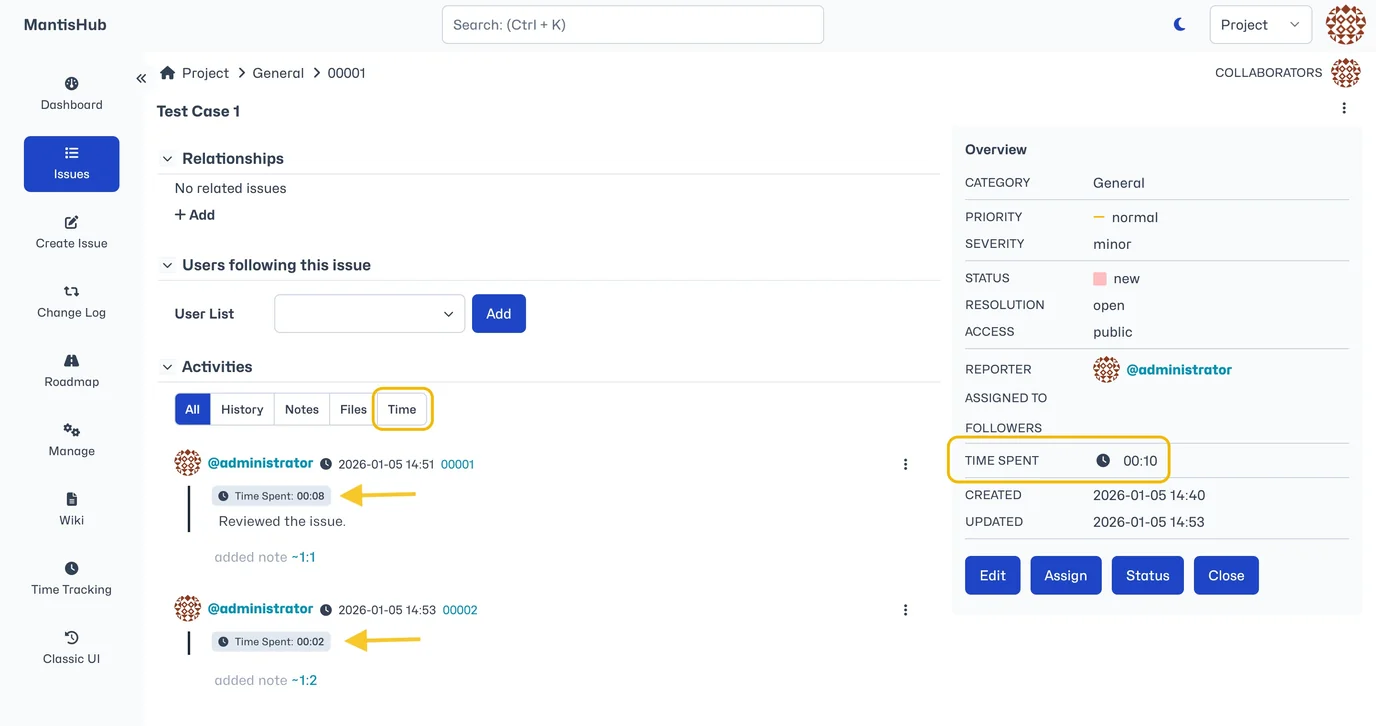
You can view the time tracking information within the issue itself. The "Time Spent" in the Overview section displays the total time tracked for that issue. To get information for a specific period, check the Activities section. You can filter the Activities specifically on Time.
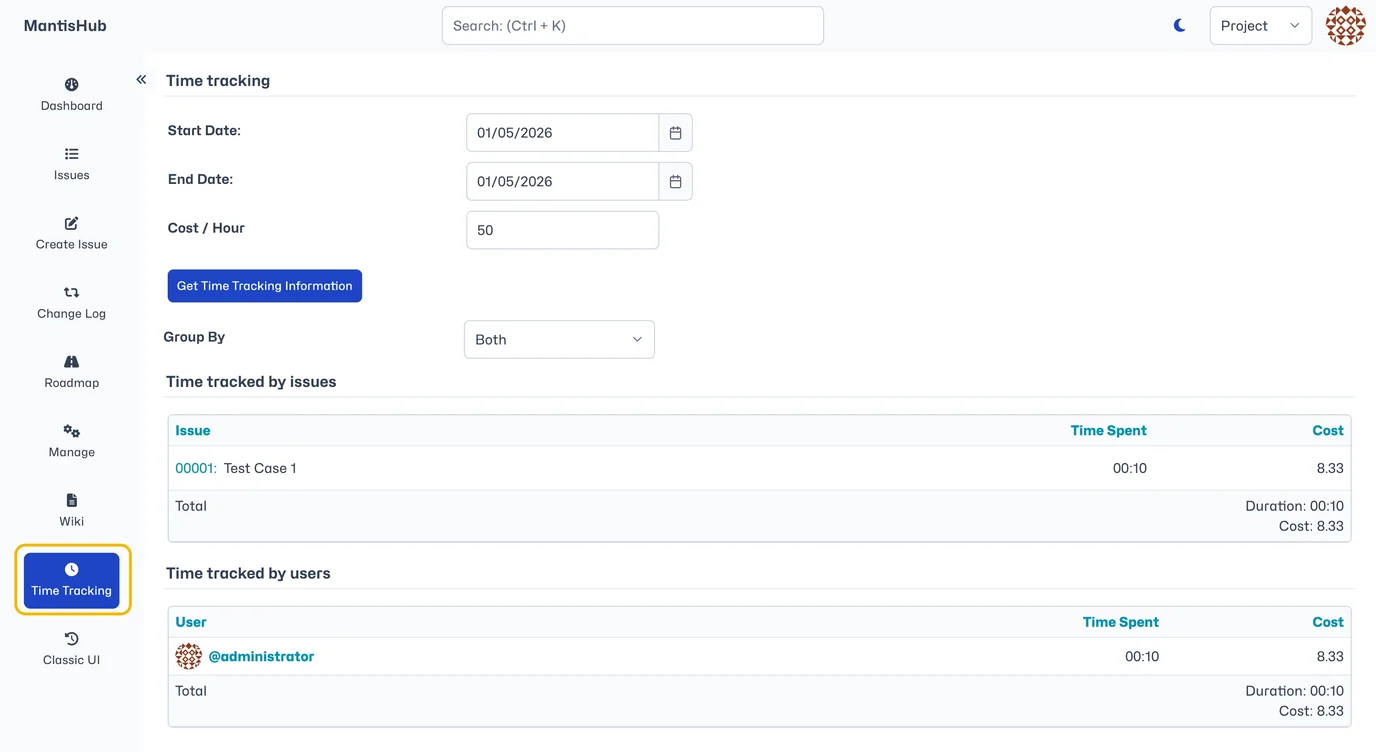
For more detailed time tracking information, users with "Time Tracking Reporting" access in the settings can use the "Time Tracking" menu option located on the left-hand side of the screen. This feature allows you to run reports over a specific time frame for time tracking data, either per issue, per user, or both. To filter this information for a specific project, use the project selector in the top-right corner of the screen.
If you have also enabled the billing feature in time tracking, you will see a "Cost/Hour" field where you can enter your hourly rate. This will calculate the cost for the time spent on an issue or by a user.
Configure Time Tracking
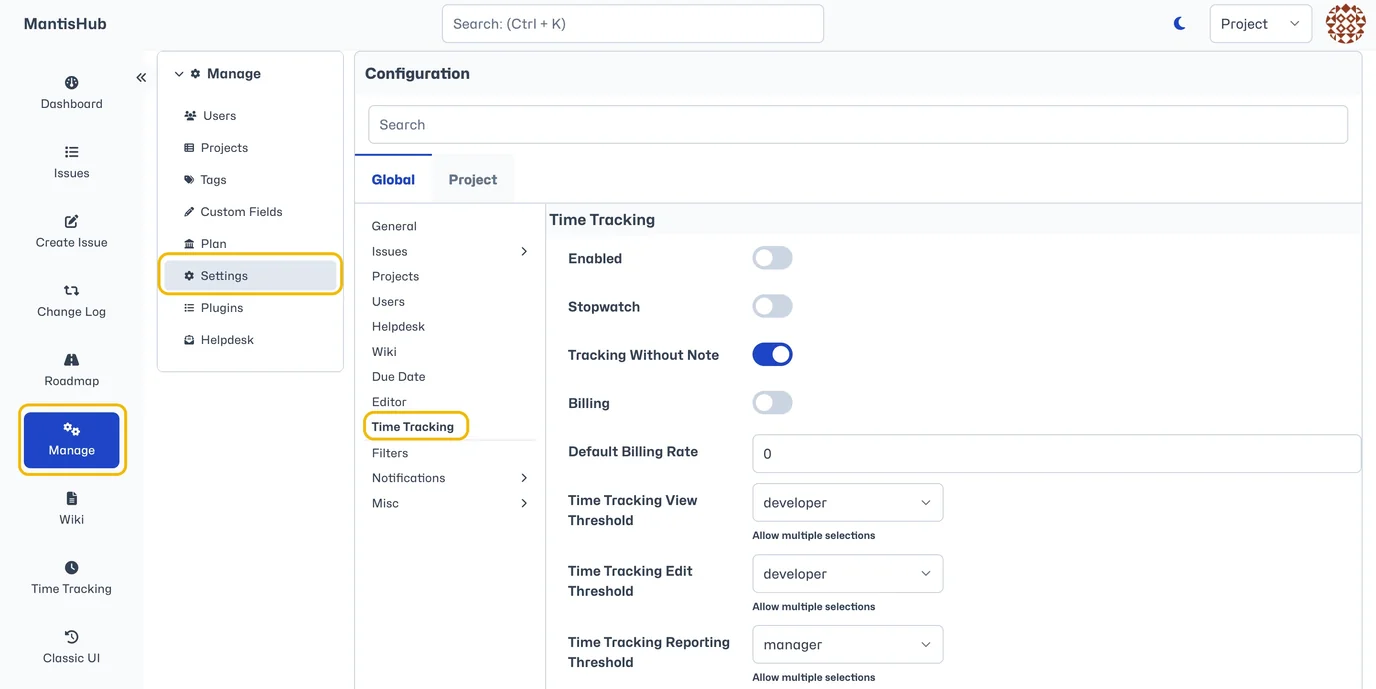
MantisHub enables users to set up time tracking so they can log time against the issues they are working on. This feature can be enabled through your settings. Go to Manage - Settings - Time Tracking.
Time Tracking Settings:
- Select Enable to turn on the time tracking feature.
- Select Stopwatch to enable the time tracking stopwatch to be available. The stopwatch provides an alternative to manually adding time.
- Select Tracking Without Notes to allow users to add time without also adding note text.
- Select Billing, which allows you to enter a Default Billing Rate. The billing rate will be used in Time Tracking reports to calculate the cost for time spent by issue or by user.
Time Tracking Access Level Thresholds:
- Time Tracking View Threshold: This determines the minimum access level required to view time tracking information for an issue. The default is set to developer.
- Time Tracking Edit Threshold: This determines the minimum access level that can enter or edit time tracking information within an issue. The default is set to developer.
- Time Tracking Reporting Threshold: This determines the minimum access level required to view your time tracking reports. The default is set to manager.