
Accessing Your Restic Backup
MantisHub uses Restic to securely store backups in an offsite backup repository hosted on BorgBase.
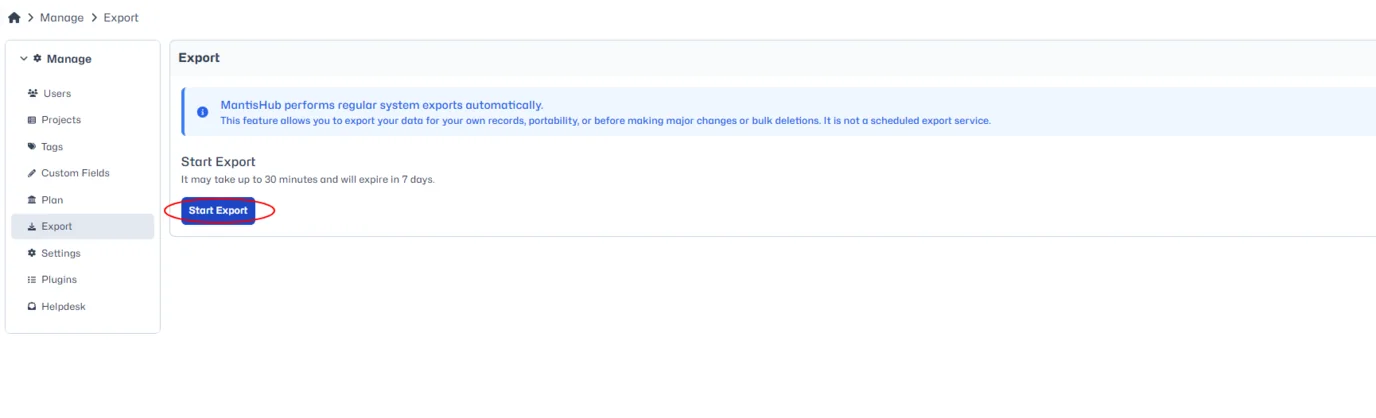
Each time you need the latest backup, click the Request Backup button to trigger a new backup.
INFO
After clicking Request Backup, wait a few moments for the backup to complete before proceeding.
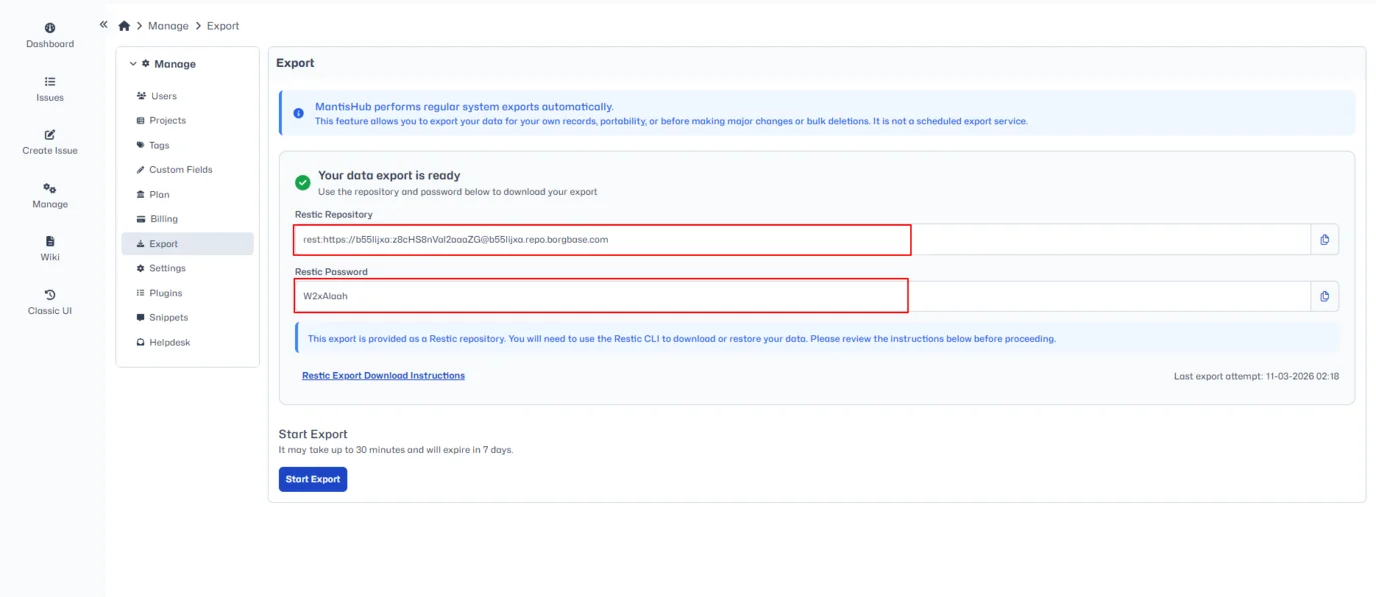
Instead of browser-based ZIP downloads, your backup access details will be displayed as shown below:
- Repository URL
- Repository Password
INFO
These credentials allow you to directly access and restore your backup using Restic.
WARNING
These credentials provide full access to your backup. Keep them secure and never share them publicly.
Prerequisites
Before proceeding, ensure:
- Restic is installed on your local machine or server
- You have sufficient disk space to restore the backup
Install Restic
Linux (Ubuntu/Debian)
sudo apt install restic -ymacOS
brew install resticWindows
Official Restic Installation Guide for Windows
Step 1: Set Your Repository Details
Linux / macOS / Git Bash (Windows)
export RESTIC_REPOSITORY="YOUR_REPO_URL_HERE"
export RESTIC_PASSWORD="YOUR_REPO_PASSWORD_HERE"
Windows (PowerShell)
$env:RESTIC_REPOSITORY="YOUR_REPO_URL_HERE"
$env:RESTIC_PASSWORD="YOUR_REPO_PASSWORD_HERE"
Windows (Command Prompt / CMD)
set RESTIC_REPOSITORY=YOUR_REPO_URL_HERE
set RESTIC_PASSWORD=YOUR_REPO_PASSWORD_HERE
This authenticates your environment with the backup repository.
Step 2: Verify Repository Access
Check if the repository is accessible:
restic snapshotsYou should see a list of available snapshots similar to:
ID        Time                 Host             Tags        Paths
--------------------------------------------------------------------------------------------------------------------------------------
a1b2c3d4  2025-12-09 03:00  MANTISHUB                   /storage/instances/00000000-0000-0000-0000-000000000000/data/attach
                                                        /storage/instances/00000000-0000-0000-0000-000000000000/data/backup/db.sql
                                                        /storage/instances/00000000-0000-0000-0000-000000000000/data/config
Step 3: Restore Full Backup
To restore the latest backup into a local folder:
restic restore latest --target ./mantishub-backupAfter completion, your restored structure include:
- Database dump, configuration files, and attachments directory, located at
storage/instances/00000000-0000-0000-0000-000000000000/data/.
Step 4: Restore a Specific Snapshot (Optional)
If you need a specific snapshot:
restic restore SNAPSHOT_ID --target ./mantishub-backupReplace SNAPSHOT_ID with the ID shown in the snapshots list.
Step 5: Restore Only a Specific File or Folder (Optional)
If you don’t need the full backup, you can restore only a specific file or folder using the --include option.
General Command
restic restore SNAPSHOT_ID --target ./mantishub-backup --include "FULL_PATH_FROM_SNAPSHOT"- Use the exact path as shown in your snapshot list.
Example: Restore Only the attach Folder
restic restore SNAPSHOT_ID --target ./mantishub-backup --include "/storage/instances/00000000-0000-0000-0000-000000000000/data/attach/*"This restores only the attachments directory without restoring database or config files.